Introduction
Overview of Web2Go - Website to React Native IOS Android App | Convert Website into App | Website to IOS App
Web2Go is a powerful and easy-to-use solution that instantly converts any responsive website into a fully functional Android and iOS mobile app using React Native. Whether you're running an e-commerce store, blog, portfolio, or business site, Web2Go lets you launch your own app without writing a single line of native code.
It comes with a fully customizable admin panel (optional) to manage features, and supports:
- WebView-based display of your website
- AdMob integration (Banner & Interstitial ads)
- Firebase Push Notifications
- Pull to Refresh, Onboarding Screens, RTL Support, and more
- Google AdMob, App Sharing, Exit Confirmation Popup
- Easy
Configuration via
URL.jsfile
This documentation provides a clear overview of the entire system, summarizing the core processes for easy understanding. The platform includes an intuitive admin panel (optional), designed for seamless use without any coding expertise.
Thank you for choosing Web2Go - Website to React Native IOS Android App | Convert Website into App | Website to IOS App If you have any questions not covered in this documentation, please feel free to reach out to us via support. We’re here to assist and will respond as promptly as possible. Thank you again!
Setup JAVA SDK
- If your System already have Java jdk-17 installed then you can skip this step.
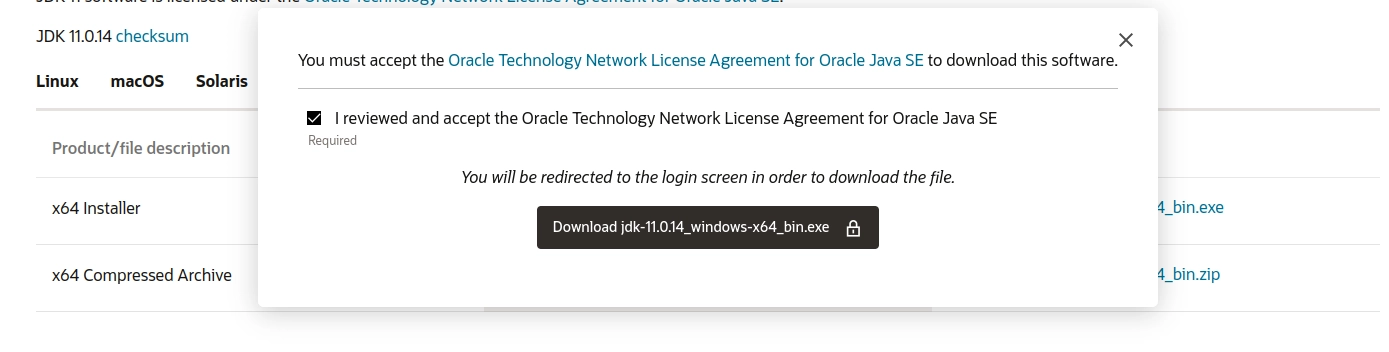
- Download Java-17 jdk by clicking given link. (JAVA jdk-17)
- Download Java-17 JDK for your version 32 bit or JDK download 64 bit.
- When you click on the Installation link the popup will be open. Click on I reviewed and accept the Oracle Technology Network License Agreement for Oracle Java SE development kit and you will be redirected to the login page. If you don’t have an oracle account you can easily sign up by adding basics details of yours.
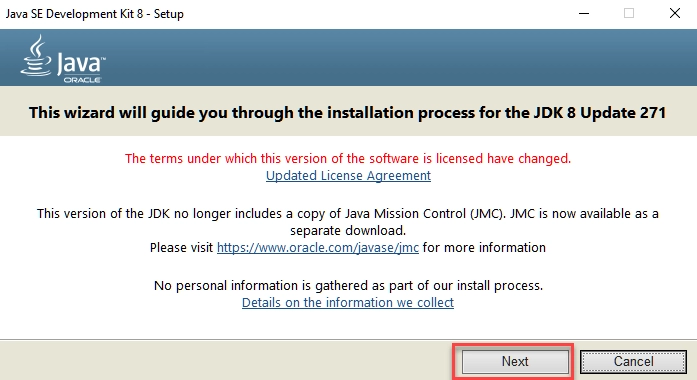
- Once the Java JDK 17 download is complete, run the exe for install JDK. Click Next
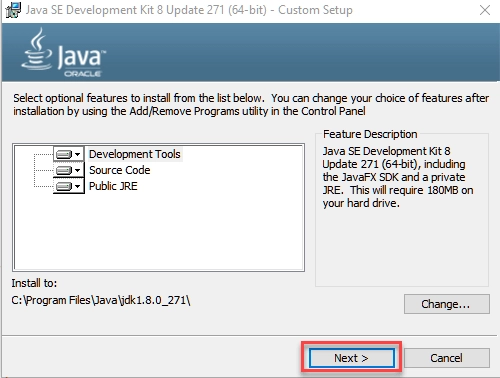
- Select the PATH to install Java in Windows… You can leave it Default. Click next
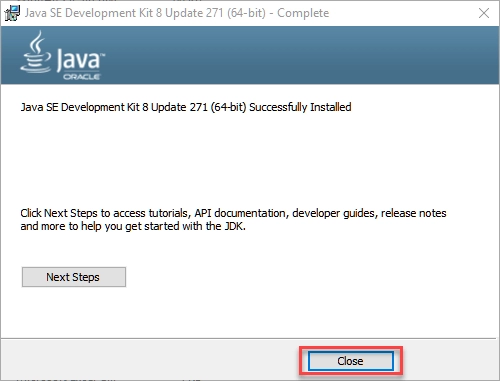
- Once you install Java in windows, click Close
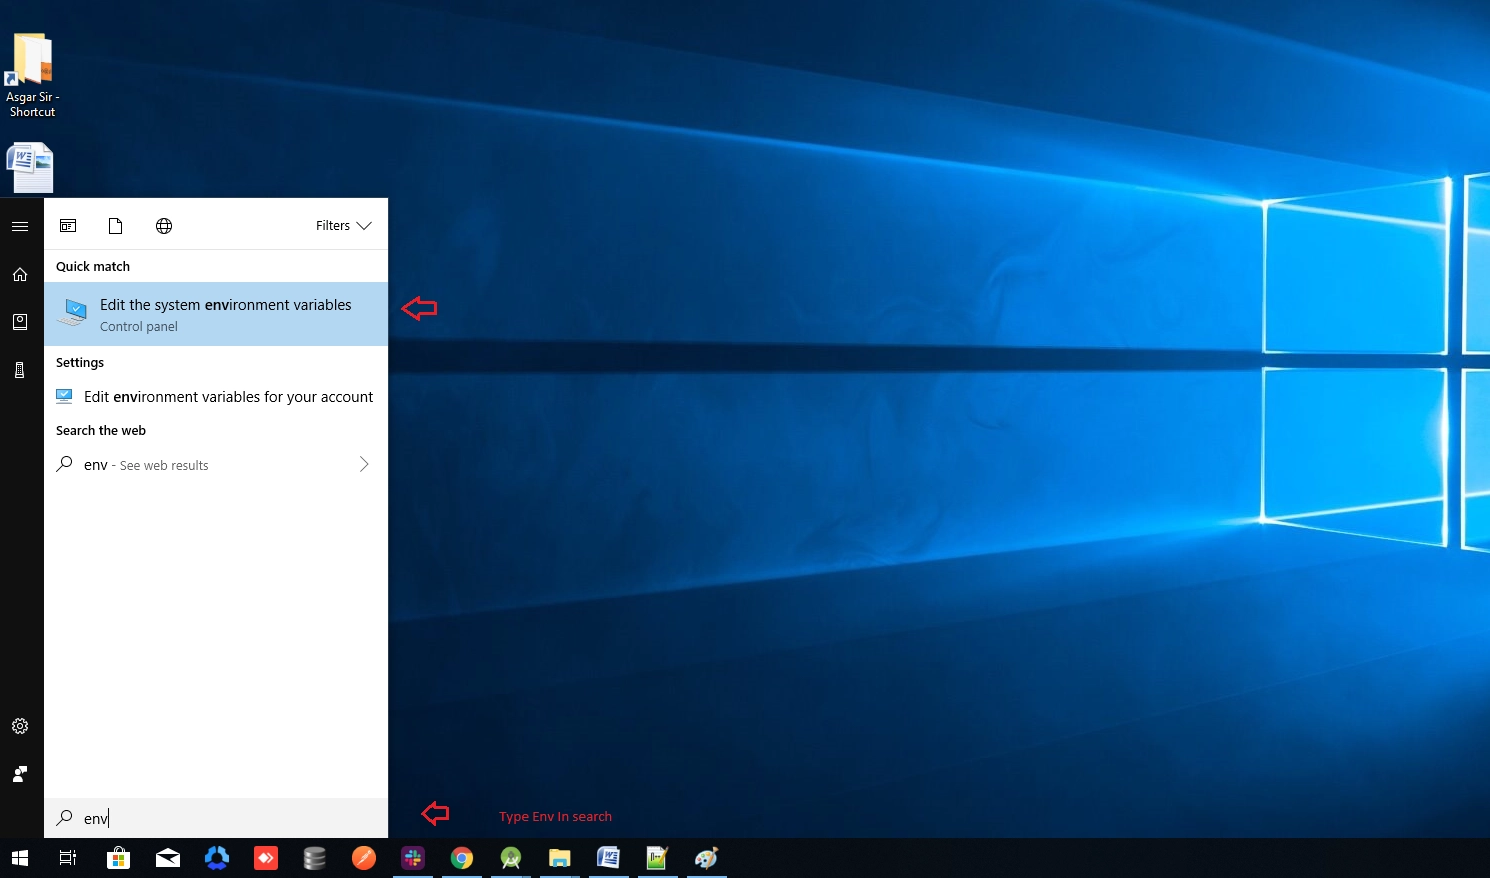
- Now set your enviournment variable
- From the Start search bar in , type ‘env’ and select Edit environment variables for your account
- Under User variables check if there is an entry called Path:
- Click on Edit. then Dialog will open from it, now click on new and Copy the path of bin folder which is installed in JDK folder. then Paste Path of bin folder in Variable value. Click on OK Button.
- Repeat above process but this time set variable name JAVA_HOME instead of "path/PATH", and set JDK bin folder path in the variable value.
- Now Restart your pc for changes to take effect
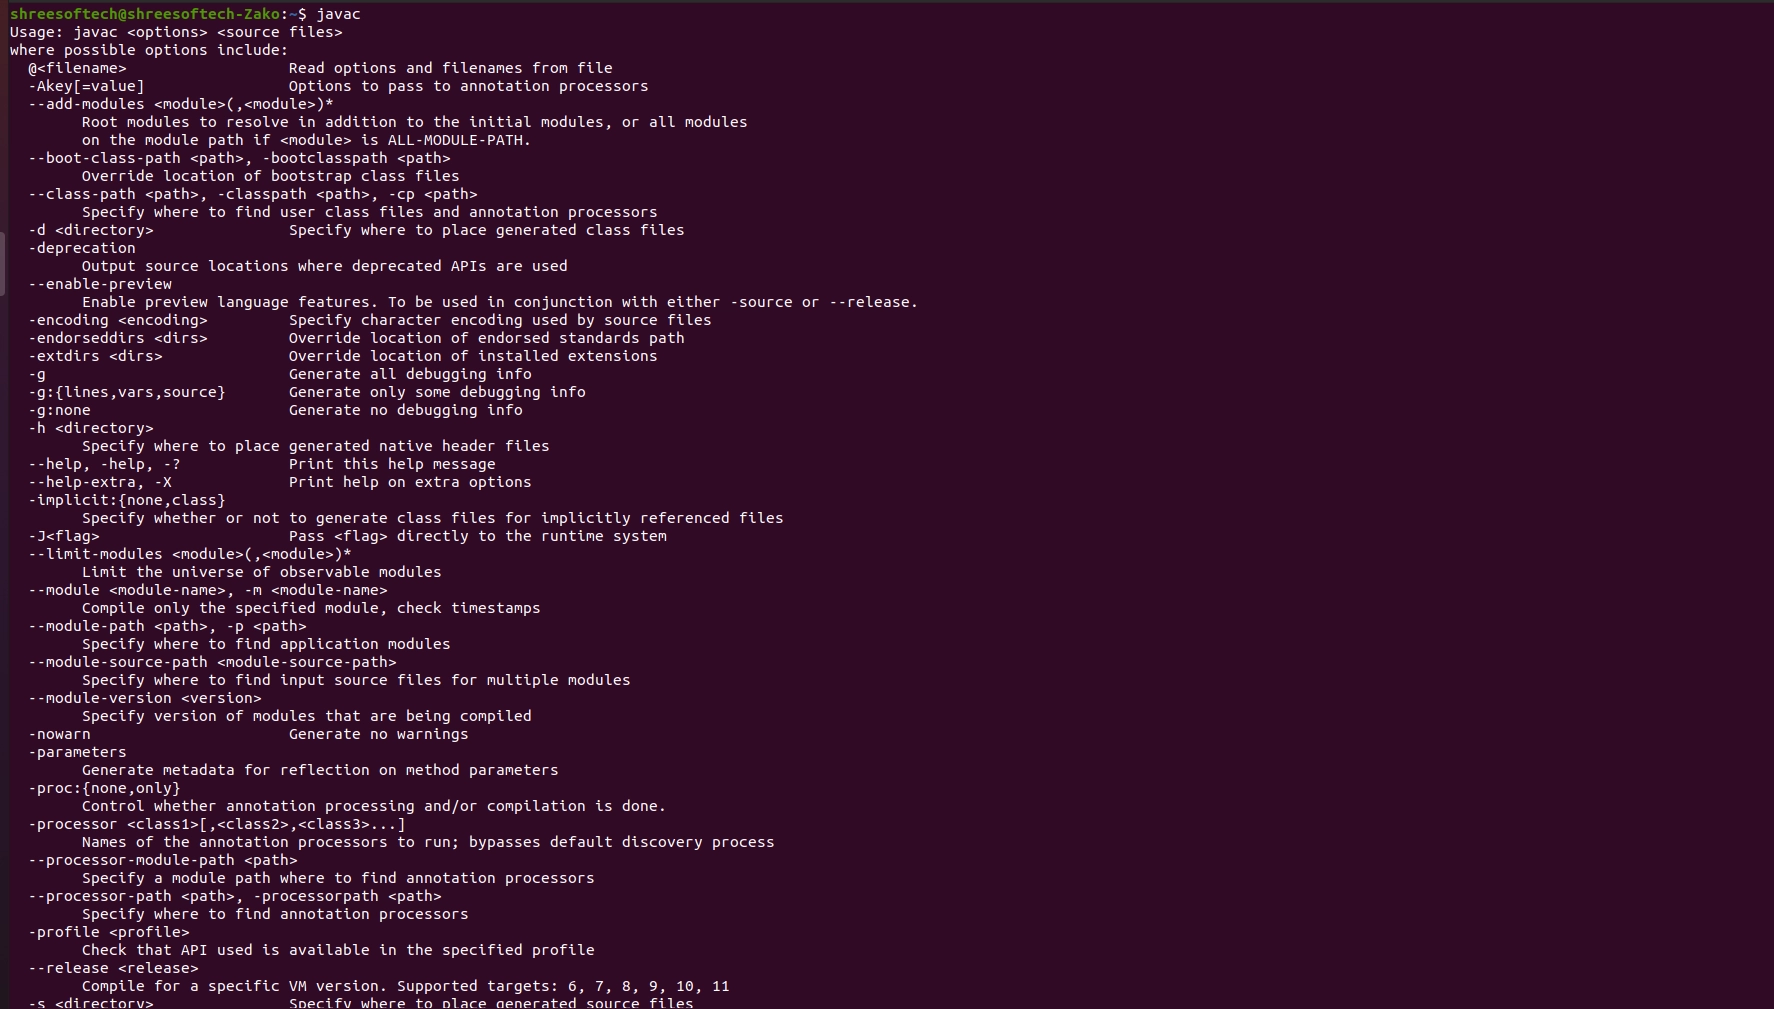
- Now check everything is ok or not
- Go to command prompt and type javac commands. If you see a screen like below, Java is installed.


Setup Android Studio
- Check here for Android Studio Installation Watch Video
Setup NODE Js
- Check here for Node Js Installation Watch Video
Change APP Name
Android
- To Change App Name Navigate from
web2go_android_ios_app_v2.5 -
Open web2go_android_ios_app_v2.5 => web2go => android => app => src => main => res => values - Now open file strings.xml change here name as you want

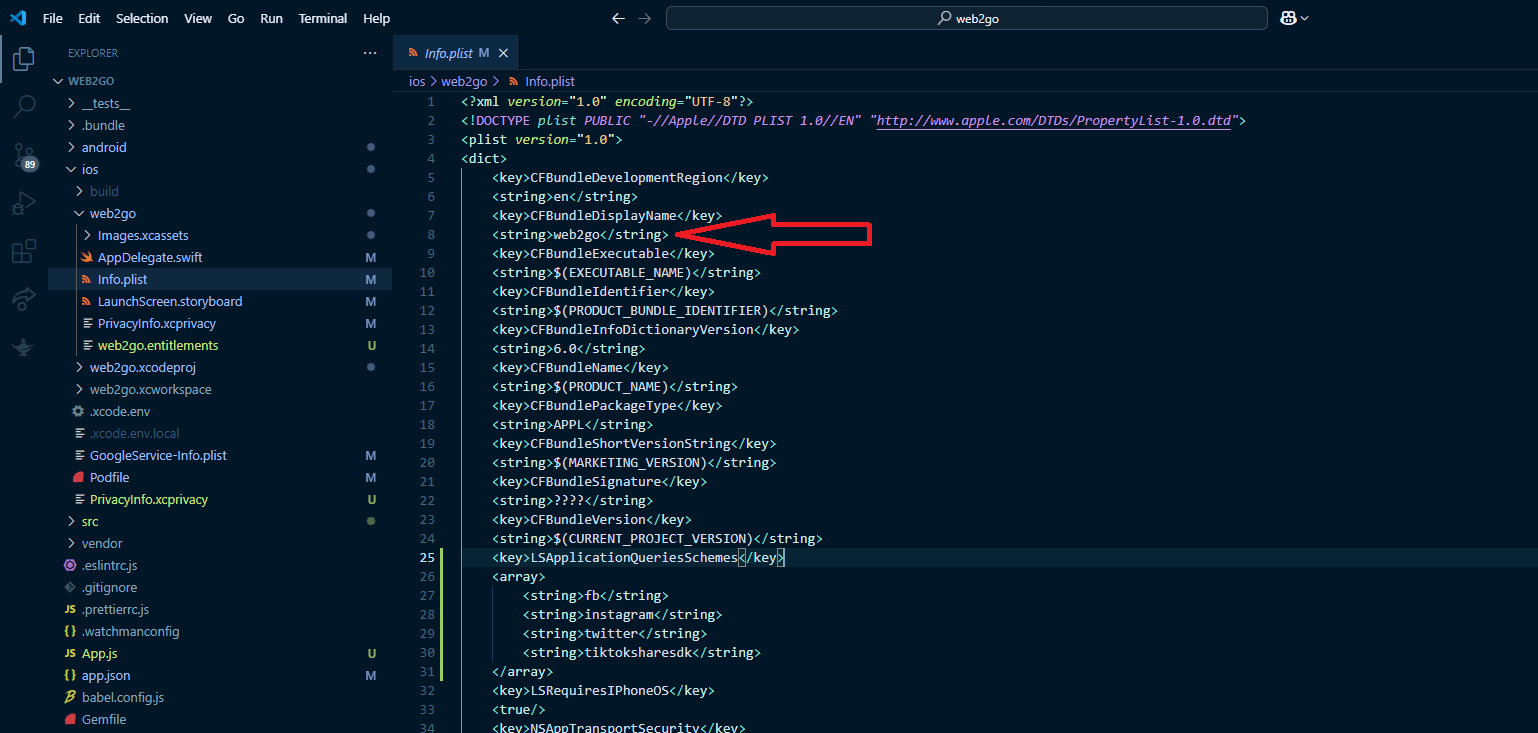
iOS
- To Change App Name Navigate from
web2go_android_ios_app_v2.5 -
Open web2go_android_ios_app_v2.5 => web2go => ios => web2go => info.plist file - Now open file info.plist change here name as you want
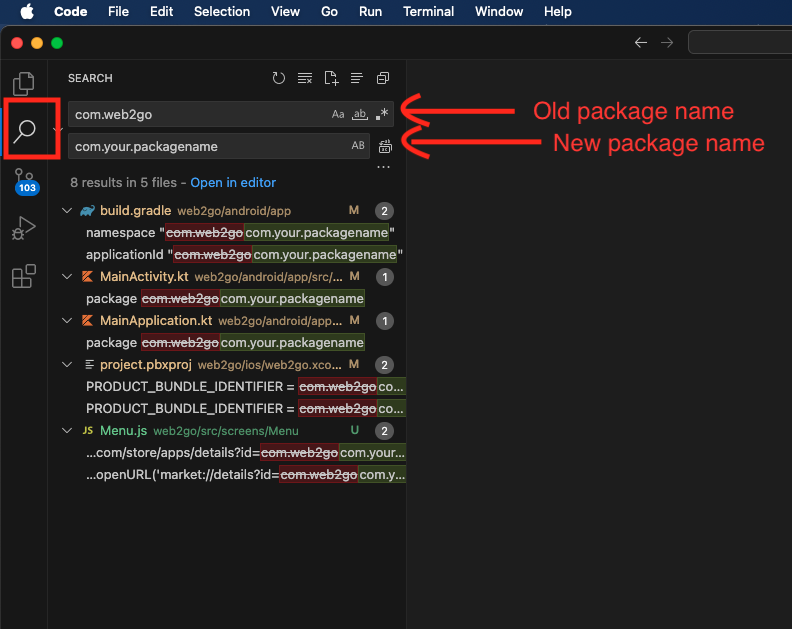
Change APP Package Name
- To Change App Name Navigate from
web2go_android_ios_app_v2.5 -
Open web2go_android_ios_app_v2.5 => open search from sidebar - Now follow below image
Change APP Logo
Android
- To Change App Logo Navigate from
web2go_android_ios_app_v2.5 -
Open web2go_android_ios_app_v2.5 => web2go => android => app => src => main => res - Now follow below image

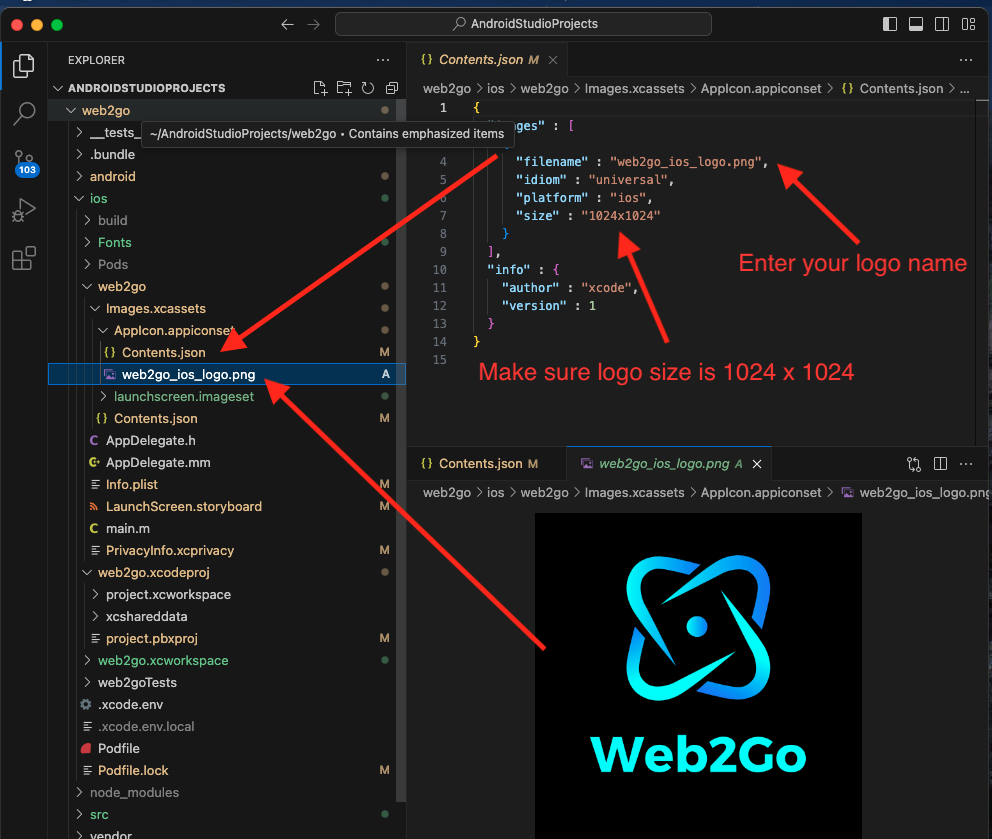
iOS
- To Change App Logo Navigate from
web2go_android_ios_app_v2.5 -
Open web2go_android_ios_app_v2.5 => web2go => ios => web2go => images.xcassets => AppIcon.appiconset - Now follow below image
Change Splash Screen
Android
- To Change App Logo Navigate from
web2go_android_ios_app_v2.5 -
Open web2go_android_ios_app_v2.5 => web2go => android => app => src => main => res - Now follow below image
- Note : your splash screen named should be screen.png

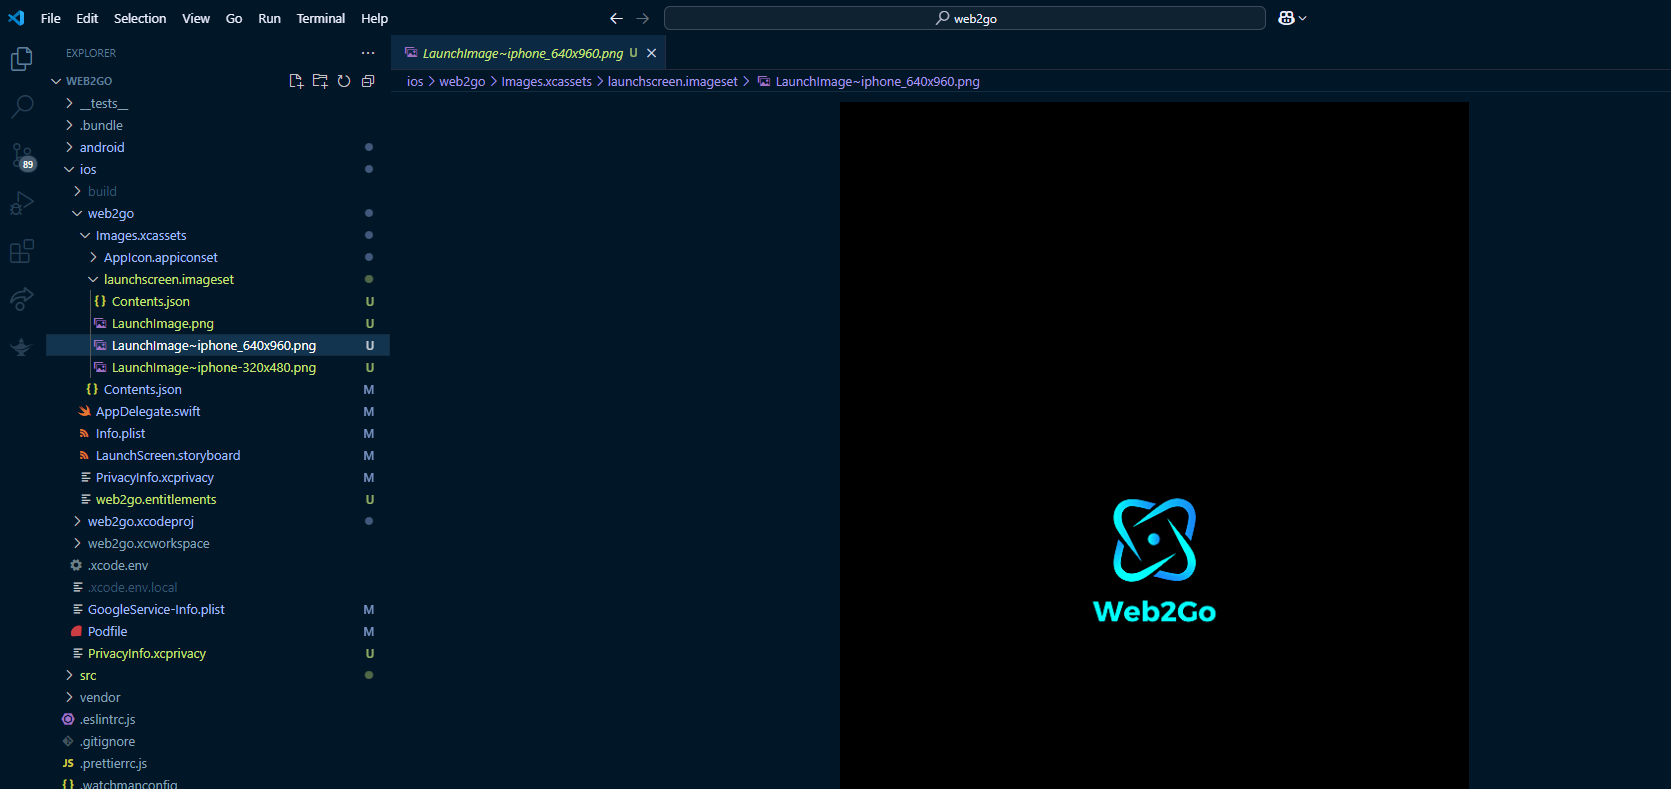
iOS
- To Change App Logo Navigate from
web2go_android_ios_app_v2.5 -
Open web2go_android_ios_app_v2.5 => web2go => ios => web2go => images.xcassets => launchscreen.imageset - Now follow below image
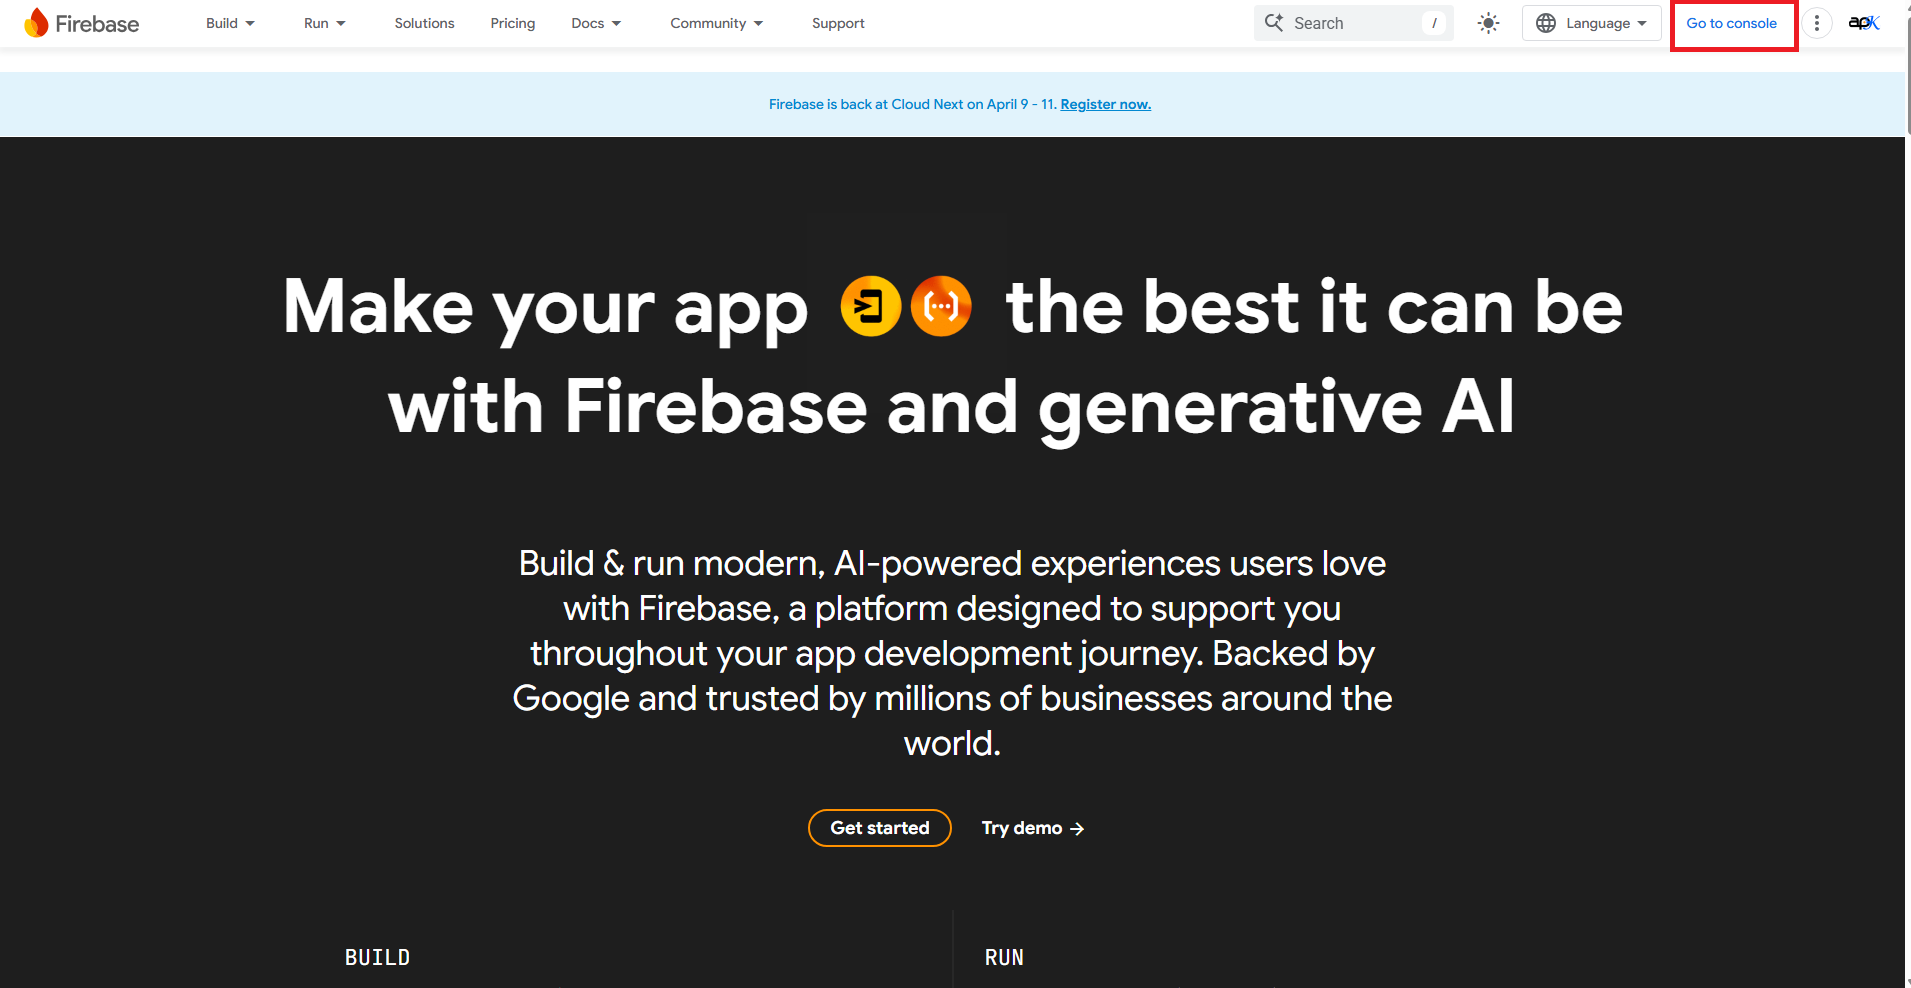
Firebase Installation
- Open official Firebase link to install Firebase in your React Native Android app:
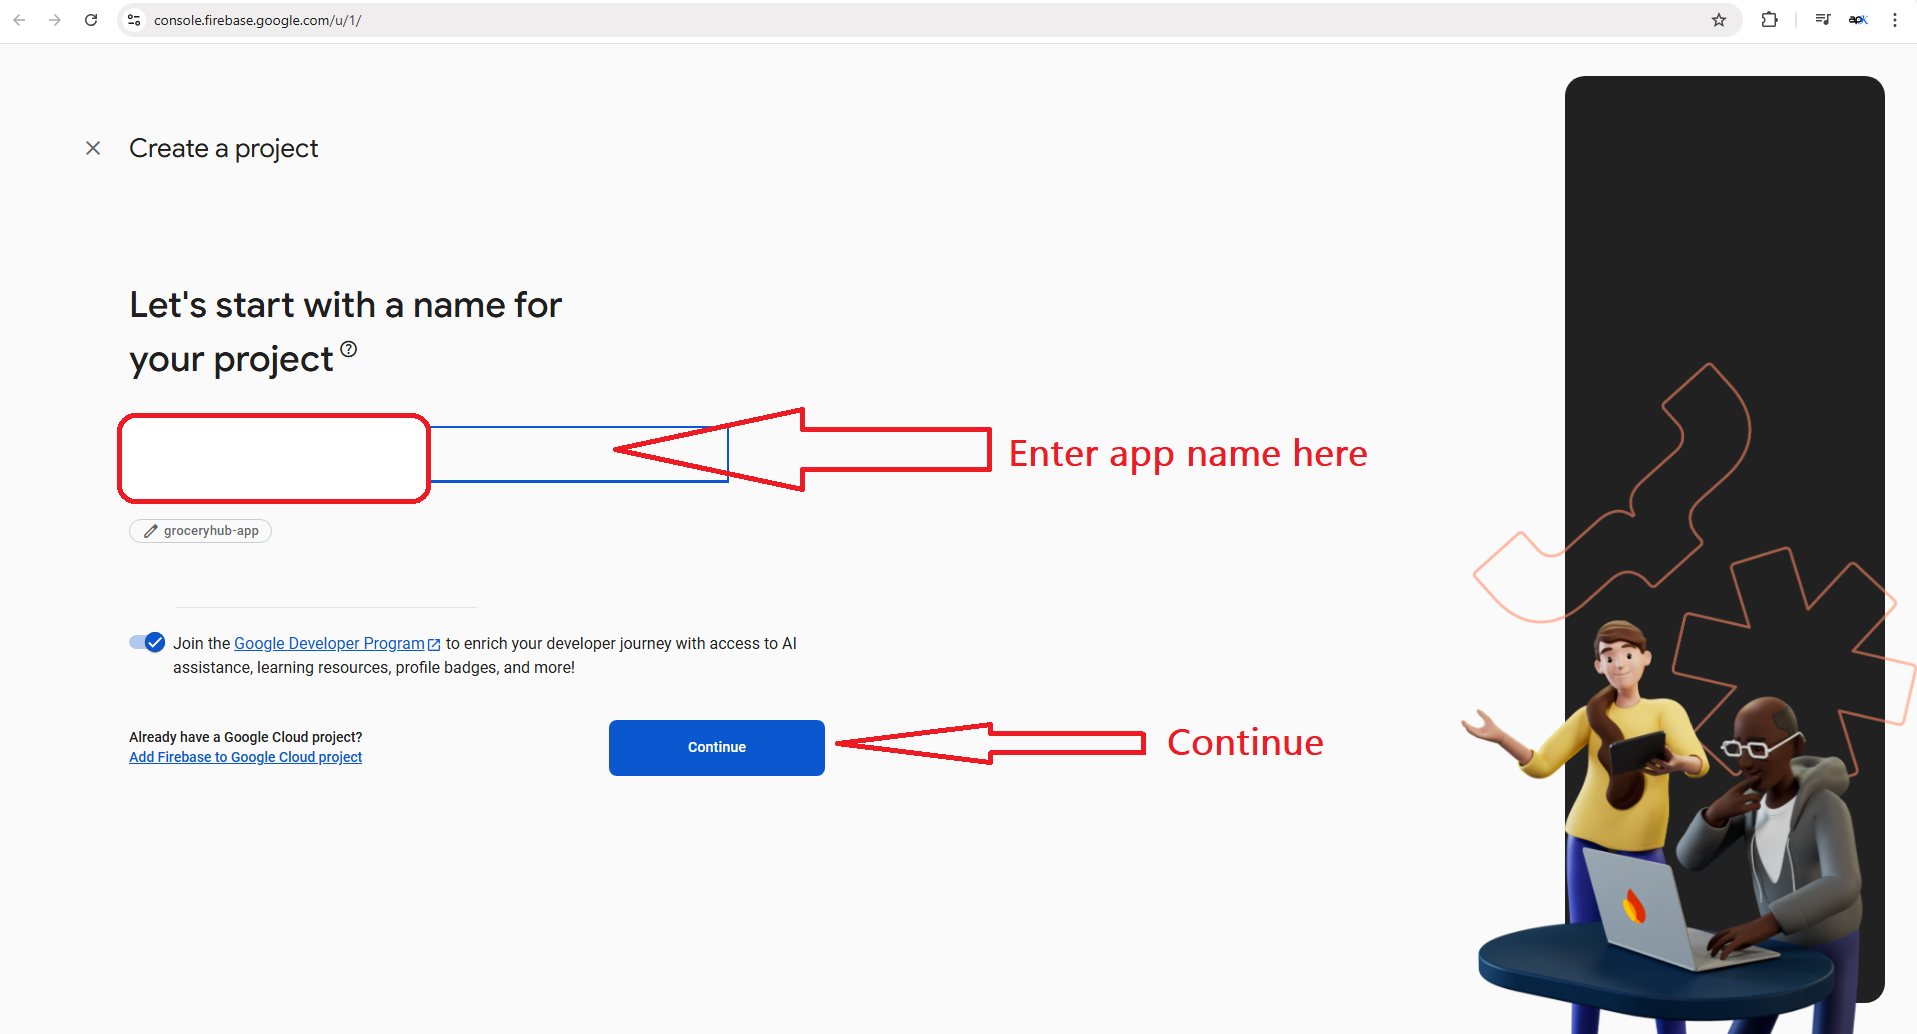
- Go to console
-
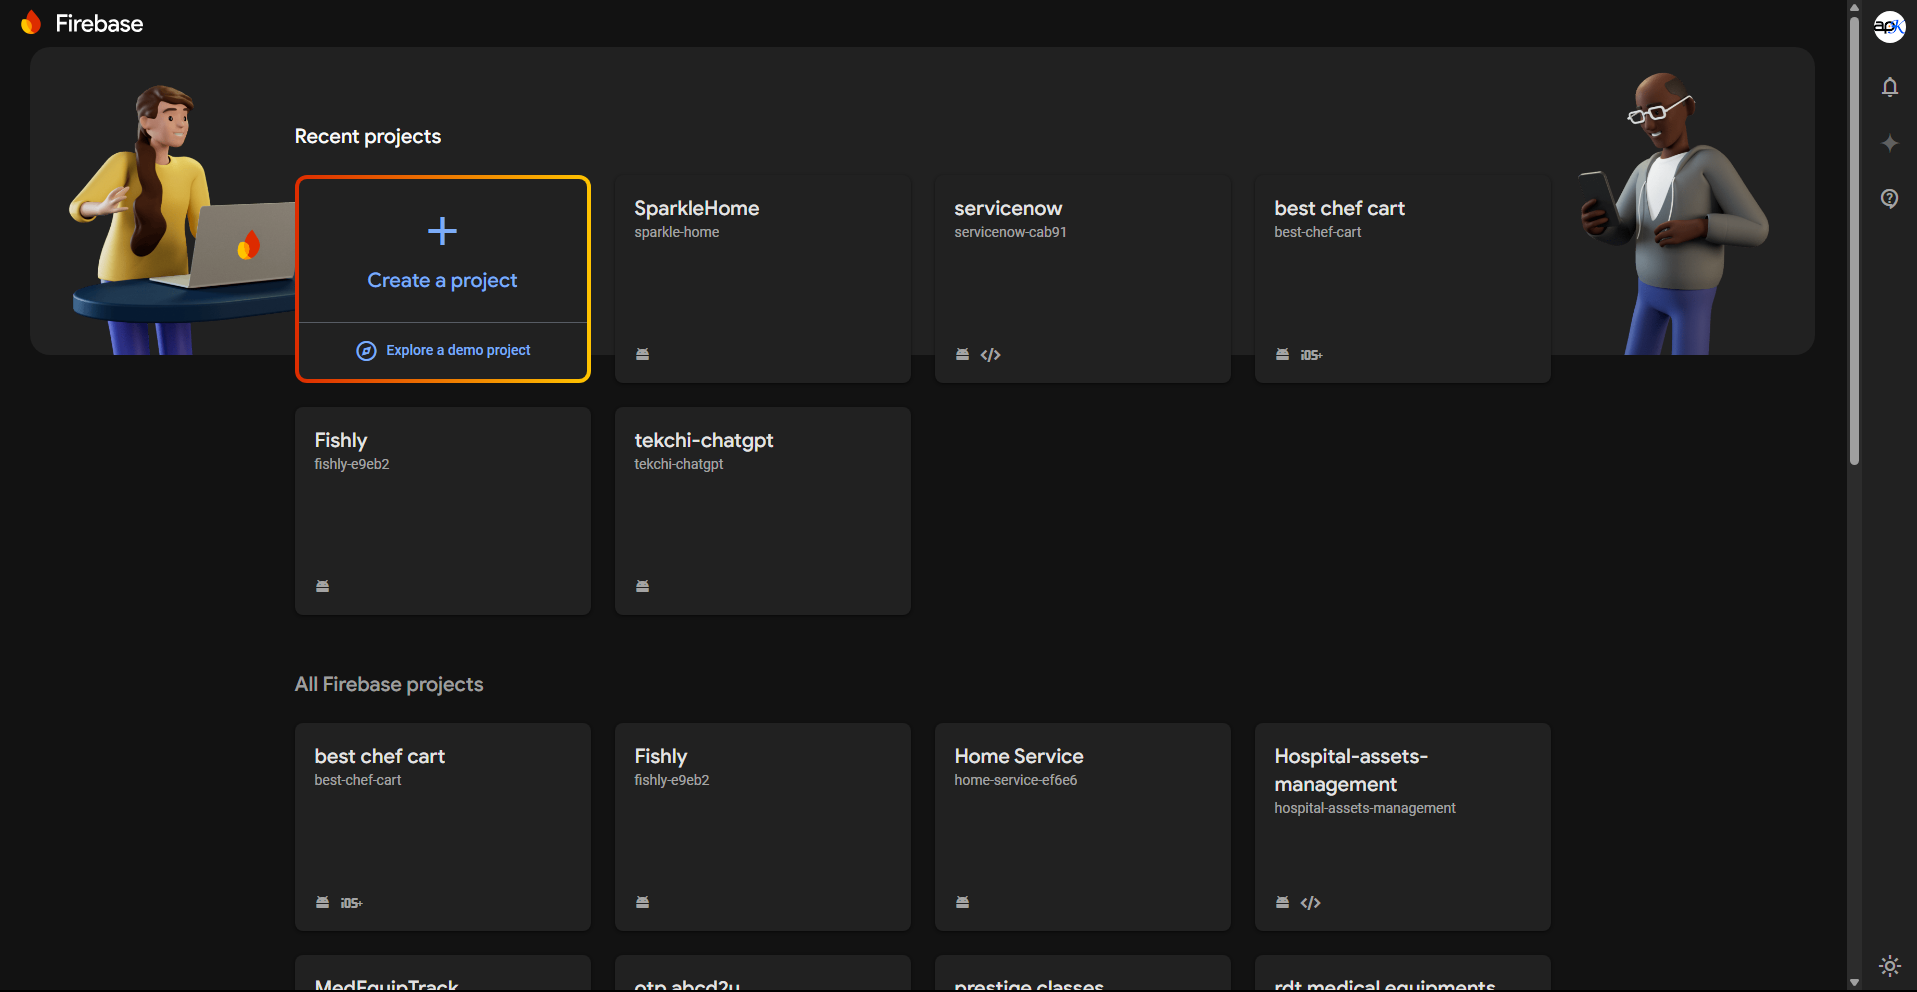
- Create a project
-
-
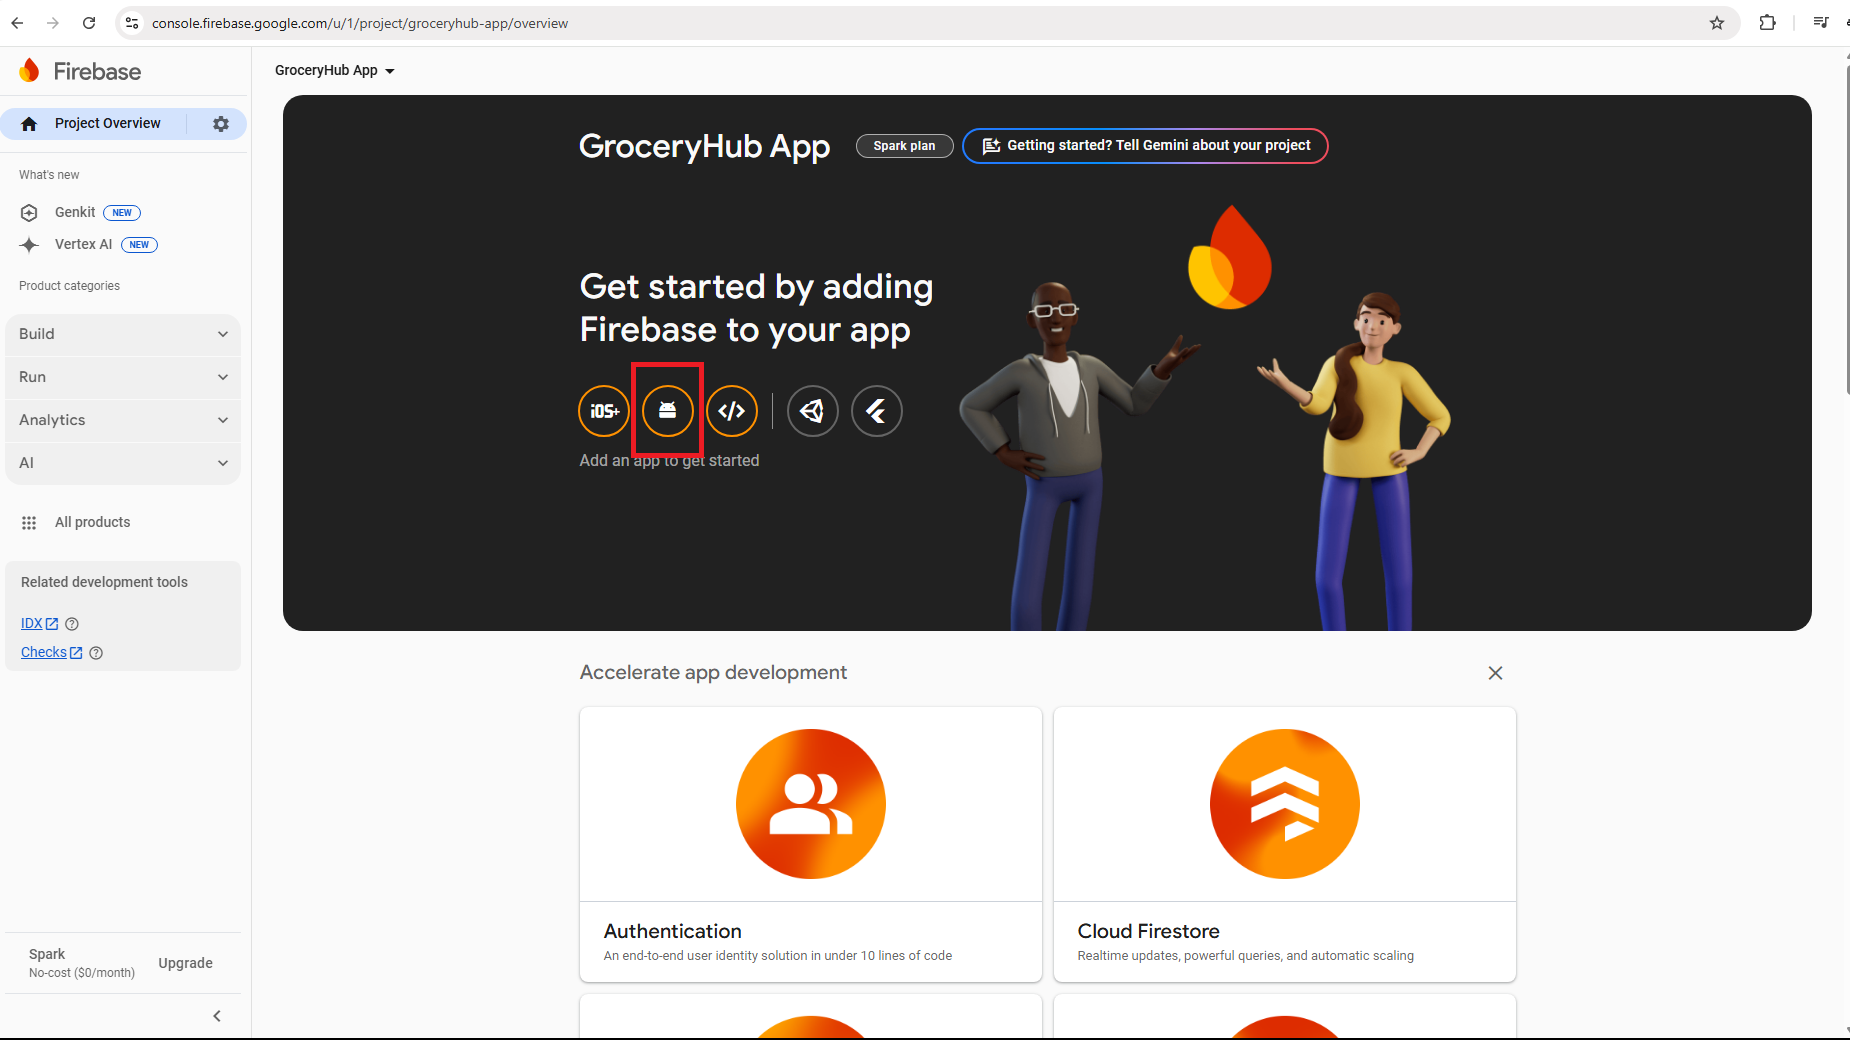
- Create Android App here
-
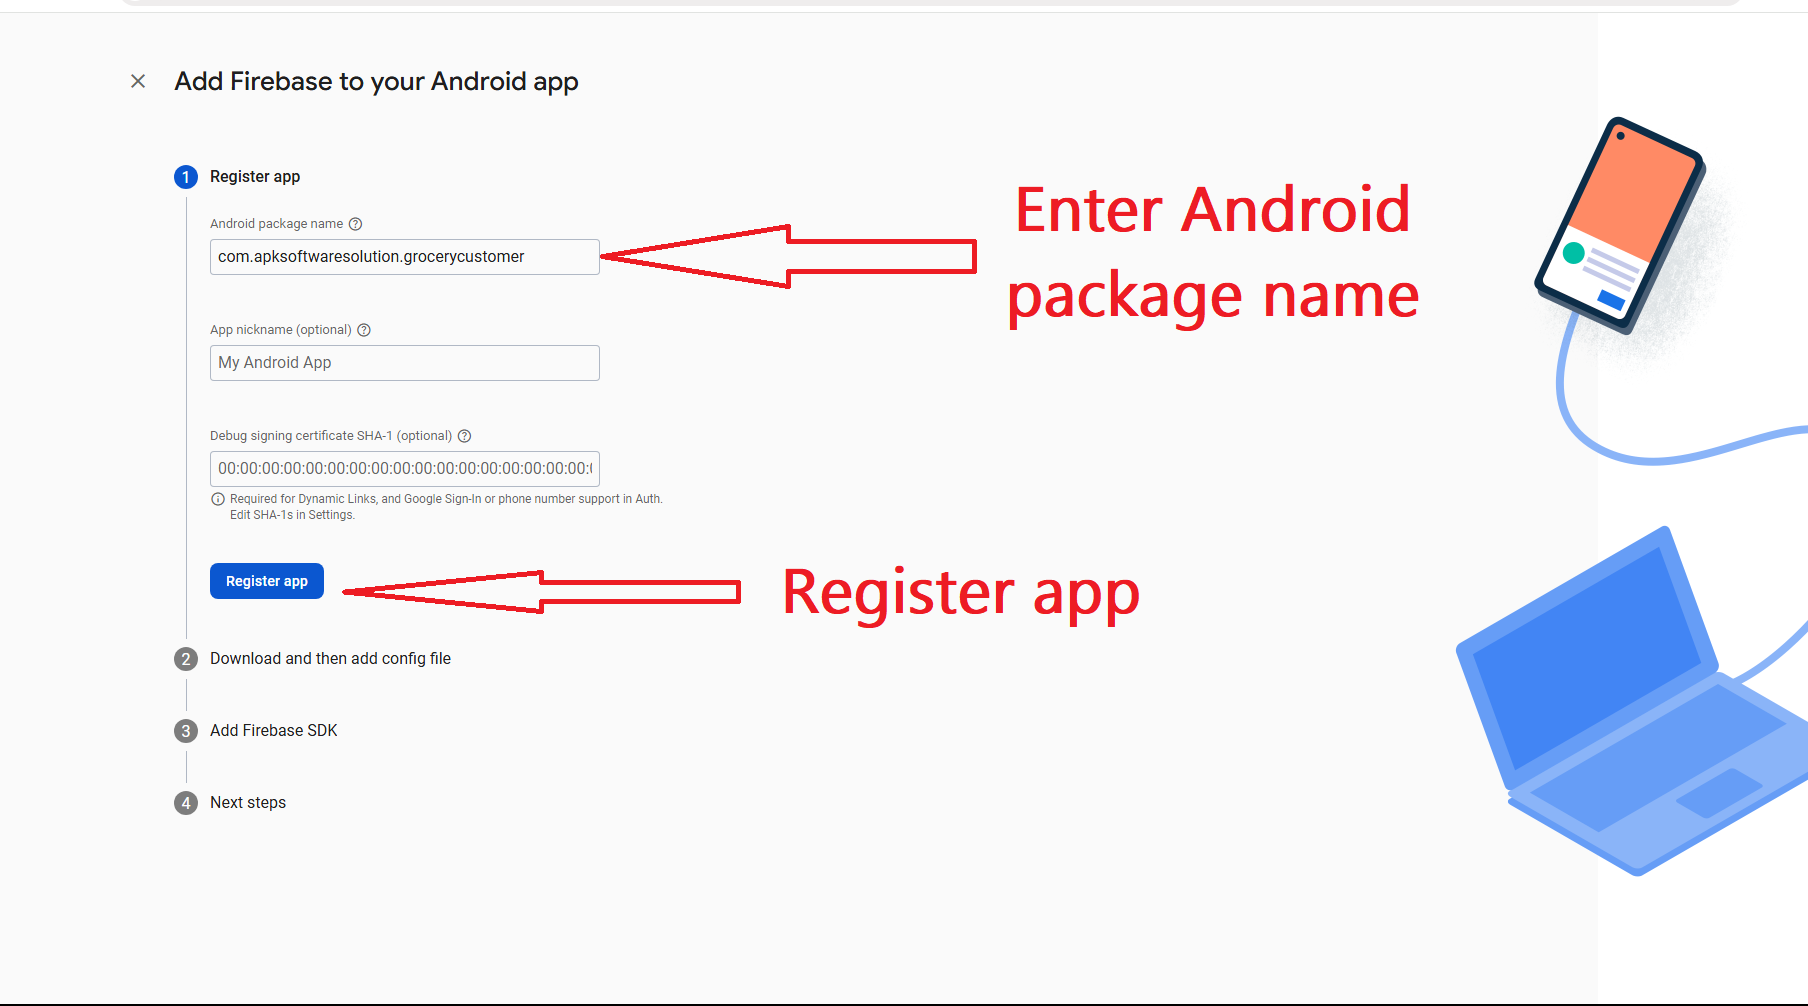
- Enter your package name here
-
-
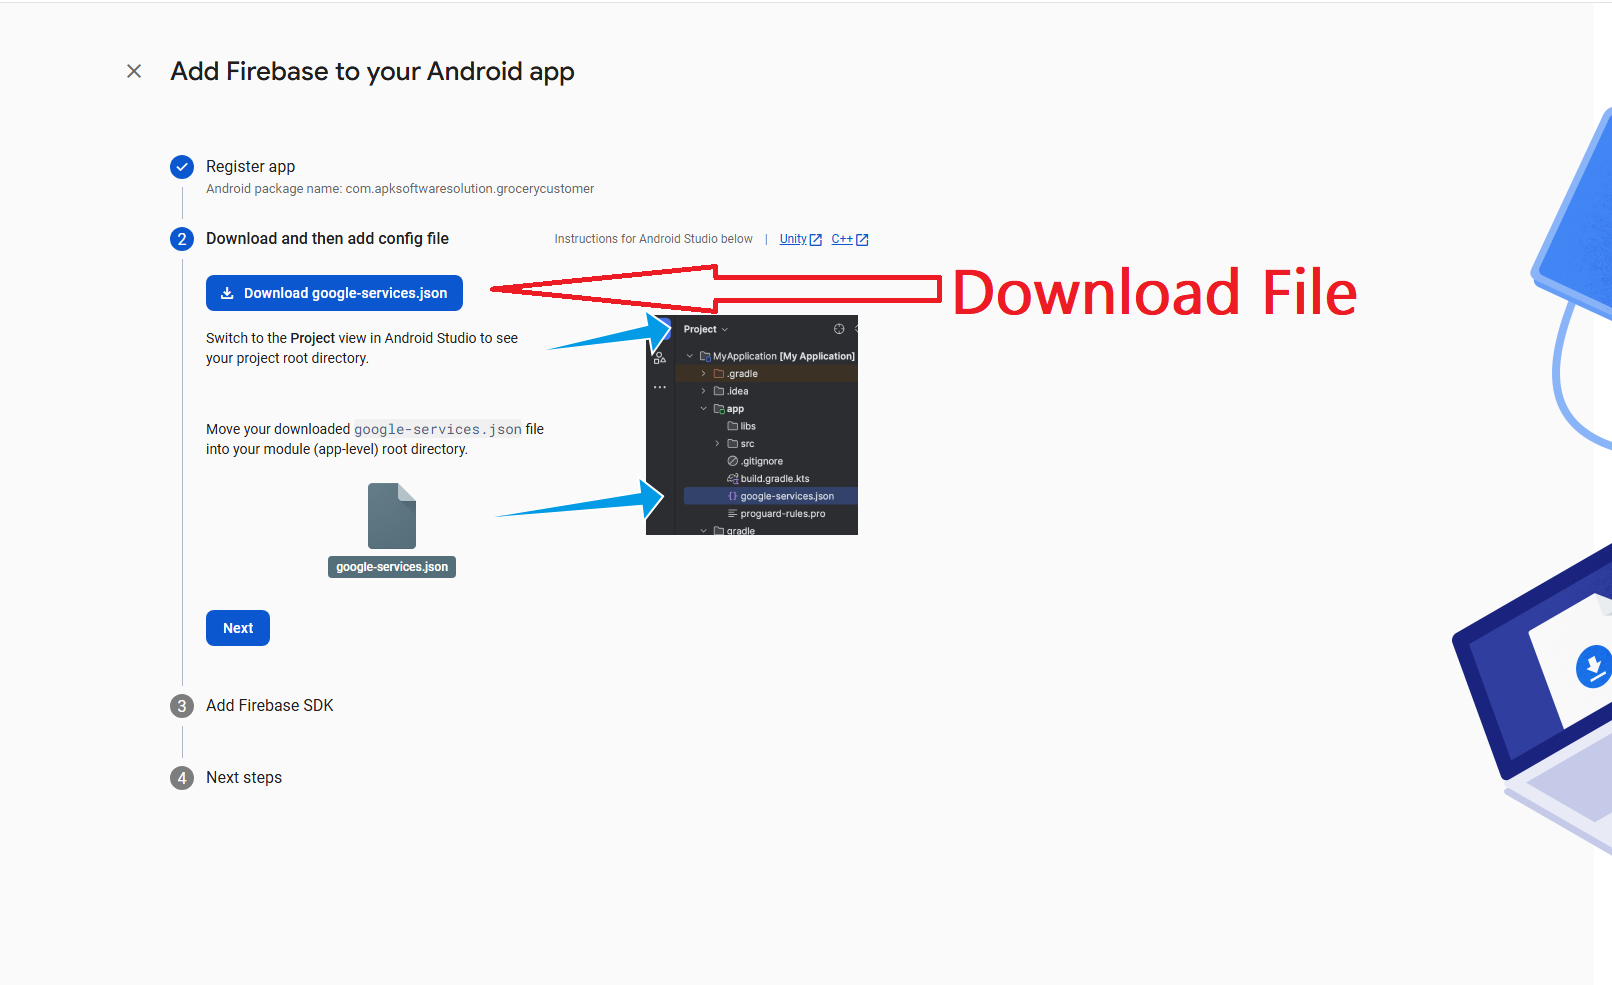
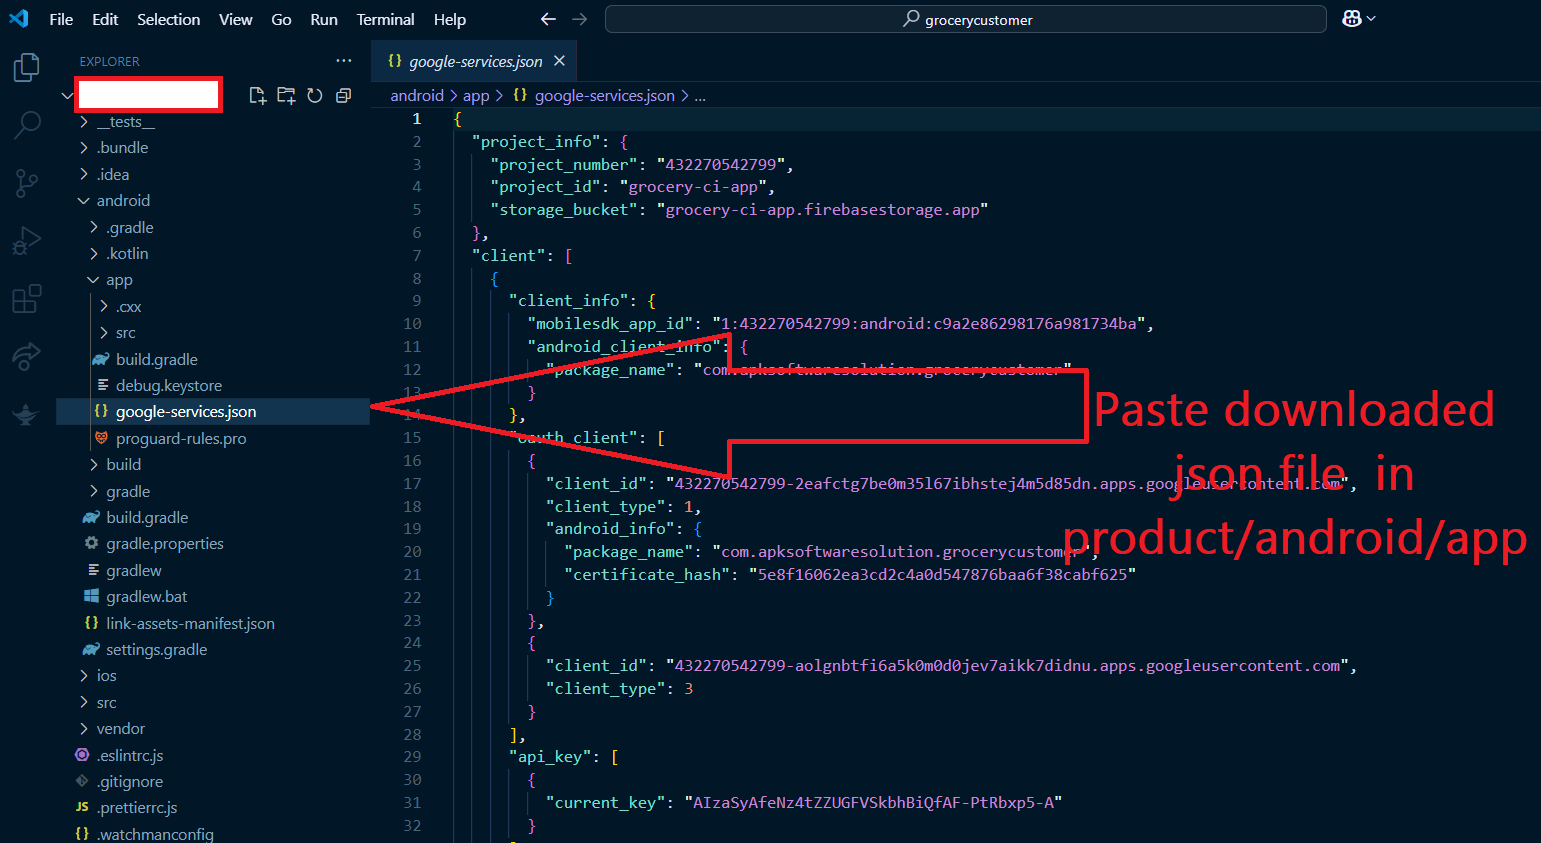
Download
google-services.jsonfile -
-
Move downloaded
google-services.jsonfile into these pathcustomer_app_project/android/app -
- After installing firebase for android lets install Firebase for iOS app:
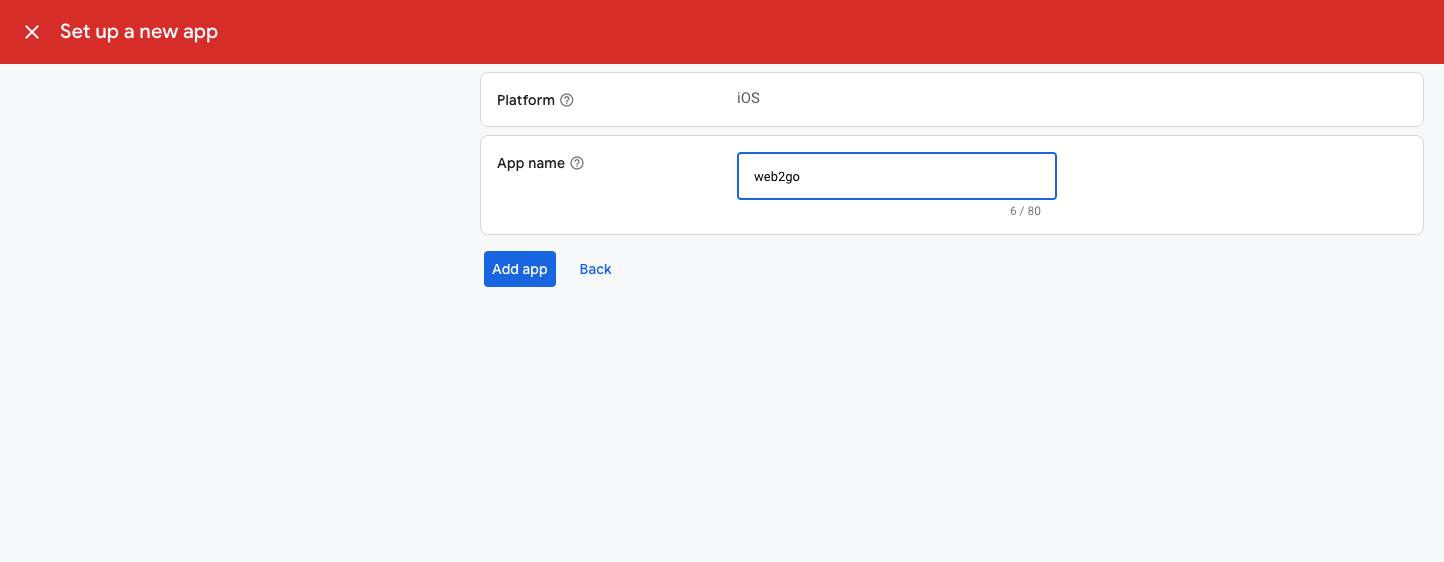
- Create iOS App here
-

- Enter Package name here
-
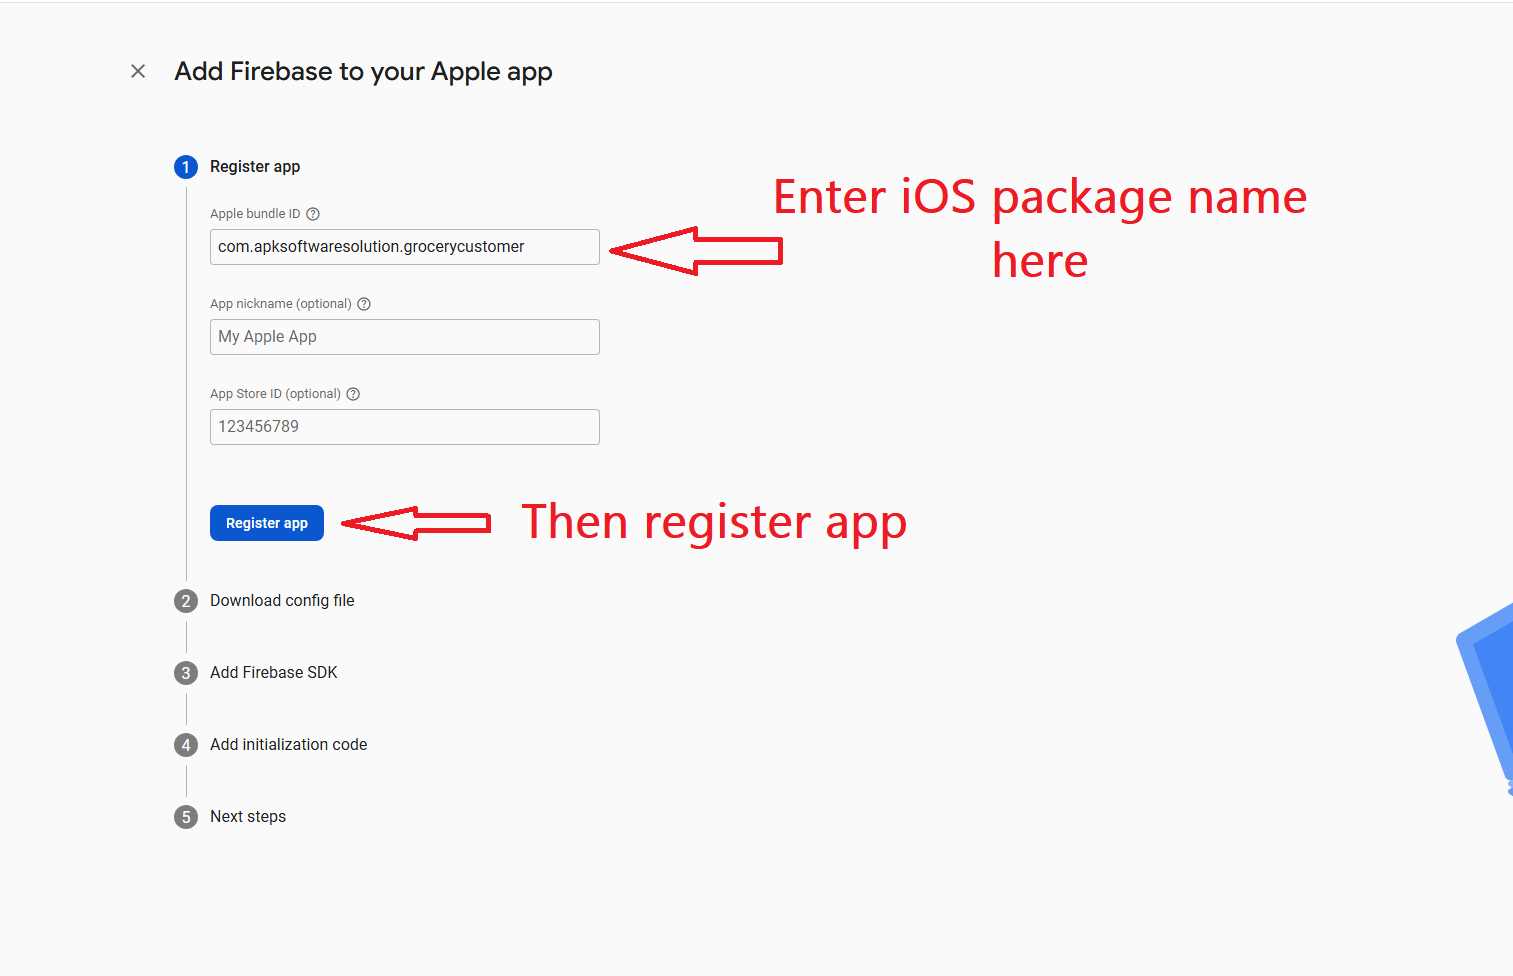
-
Download
GoogleService-Info.plistfile from here -
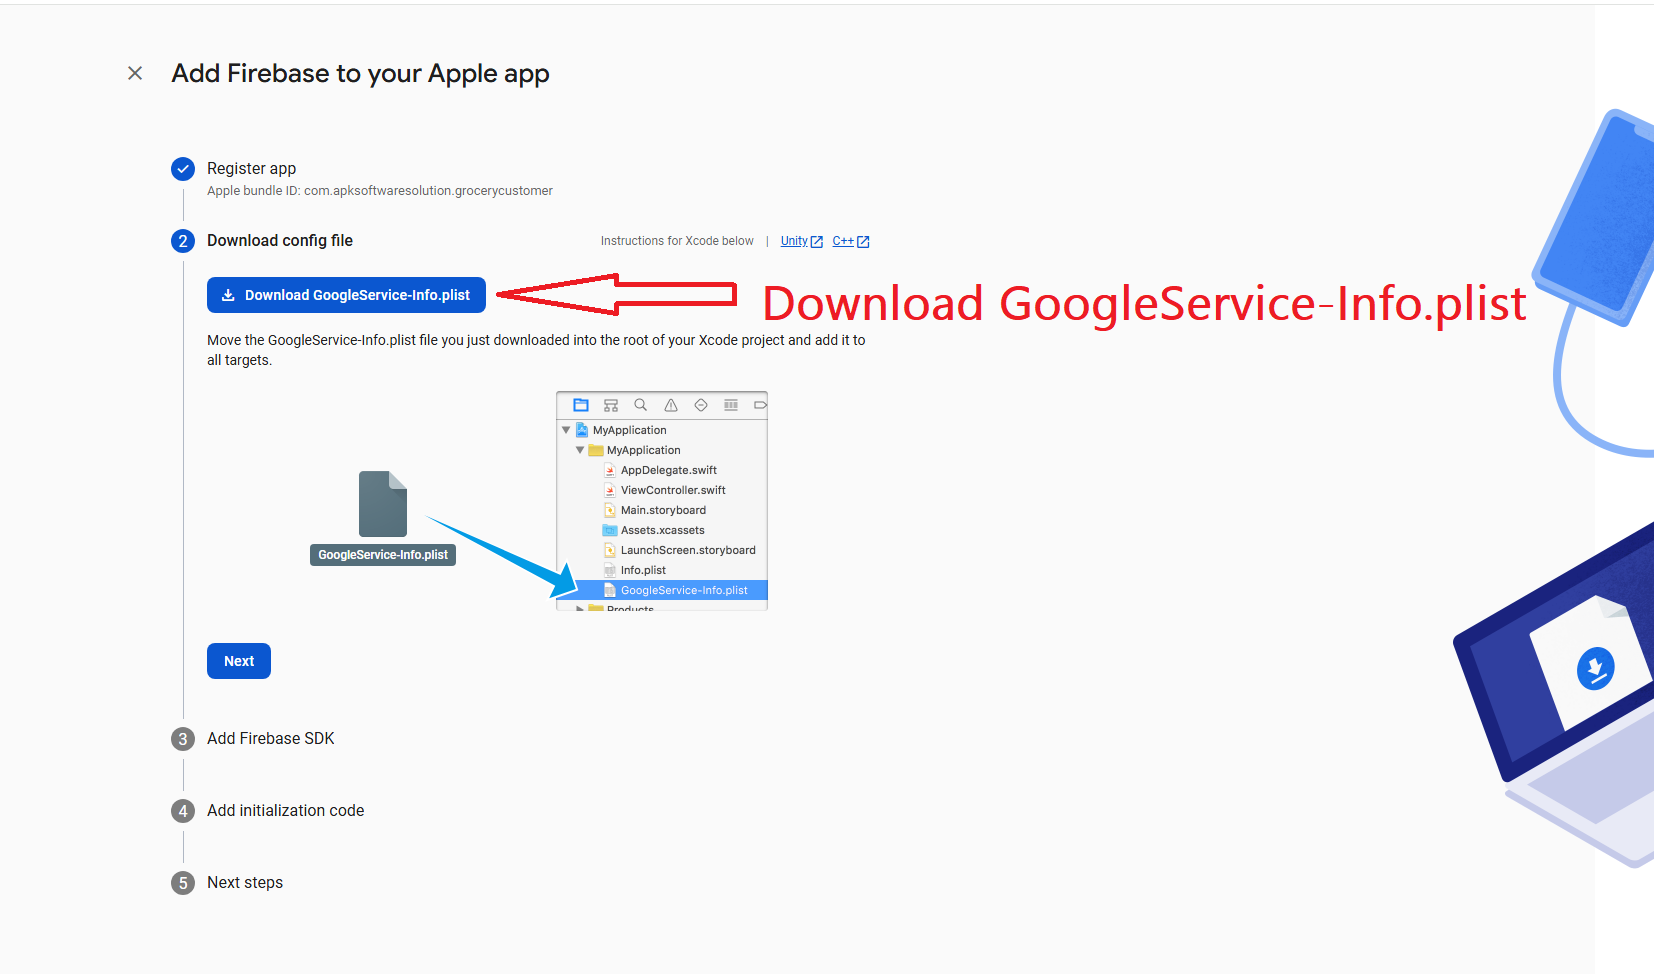
-
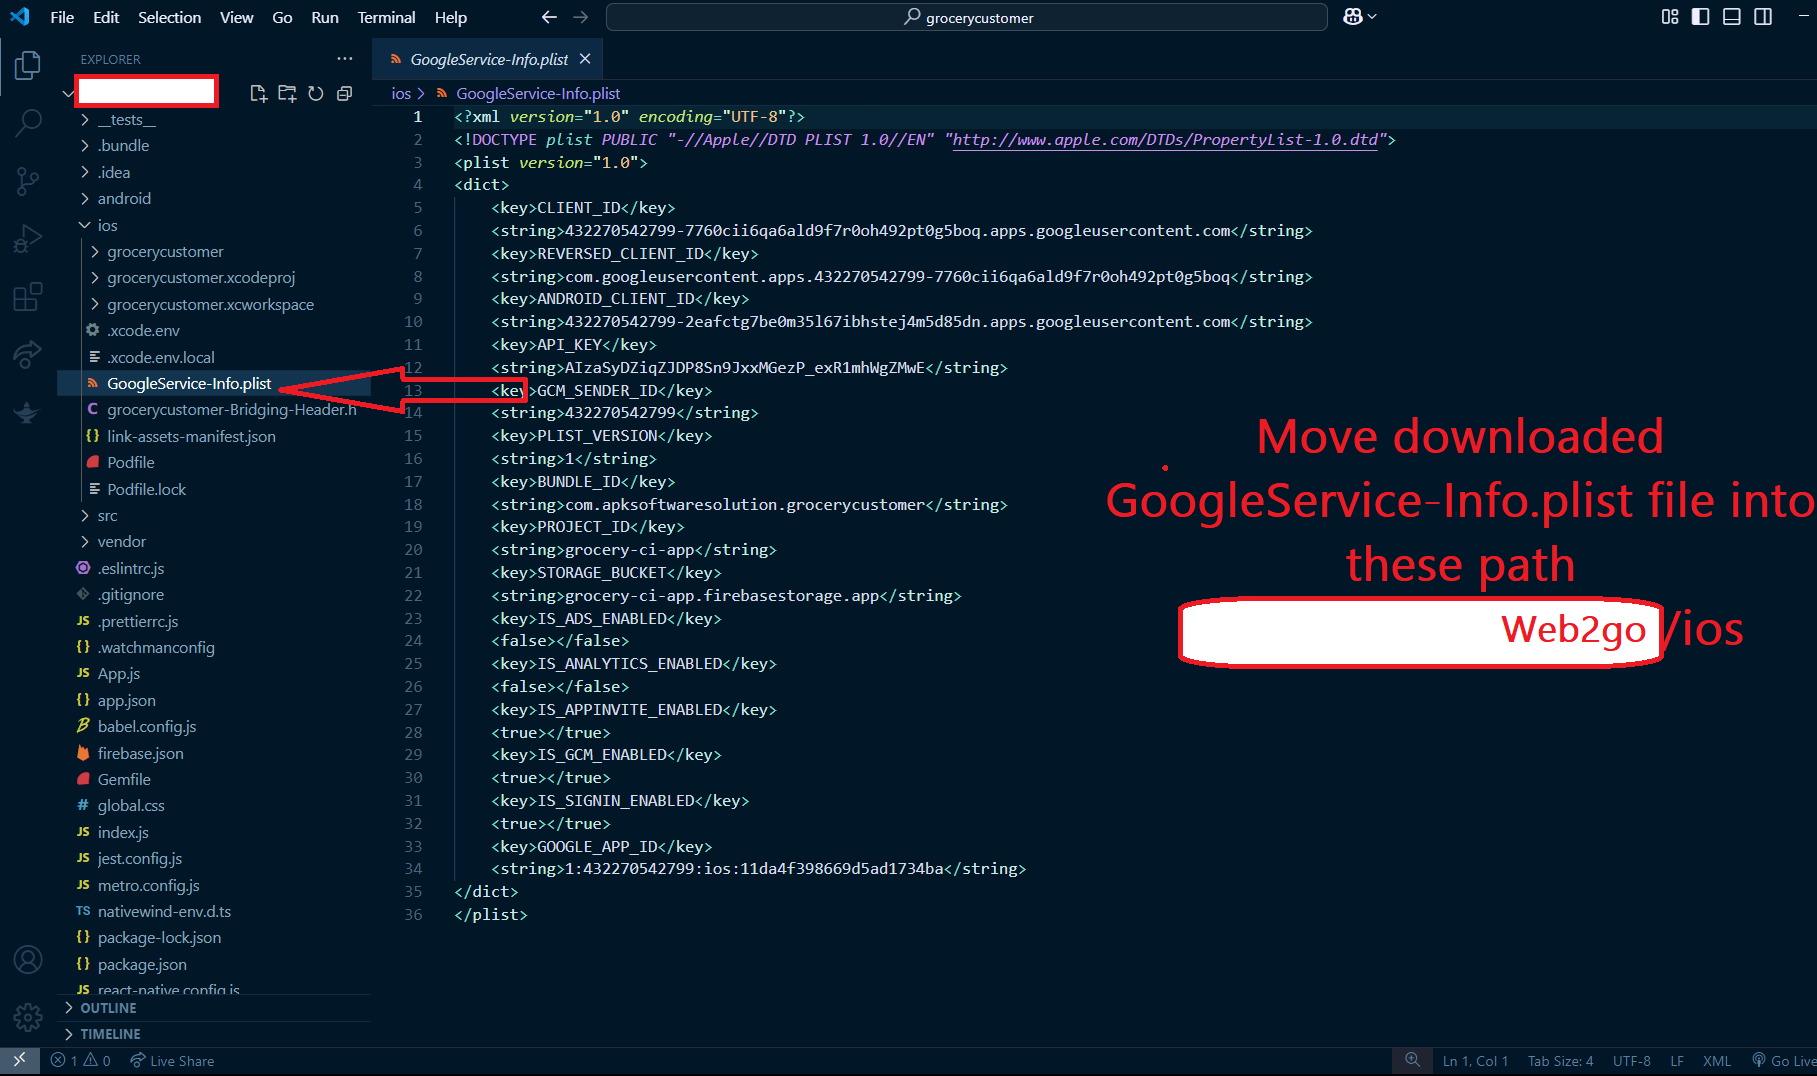
Move downloaded
GoogleService-Info.plistfile into these pathcustomer_app_project/ios -
- Navigate to "Project Settings" -> "Cloud Messaging" -> "Apple app configuration."
-
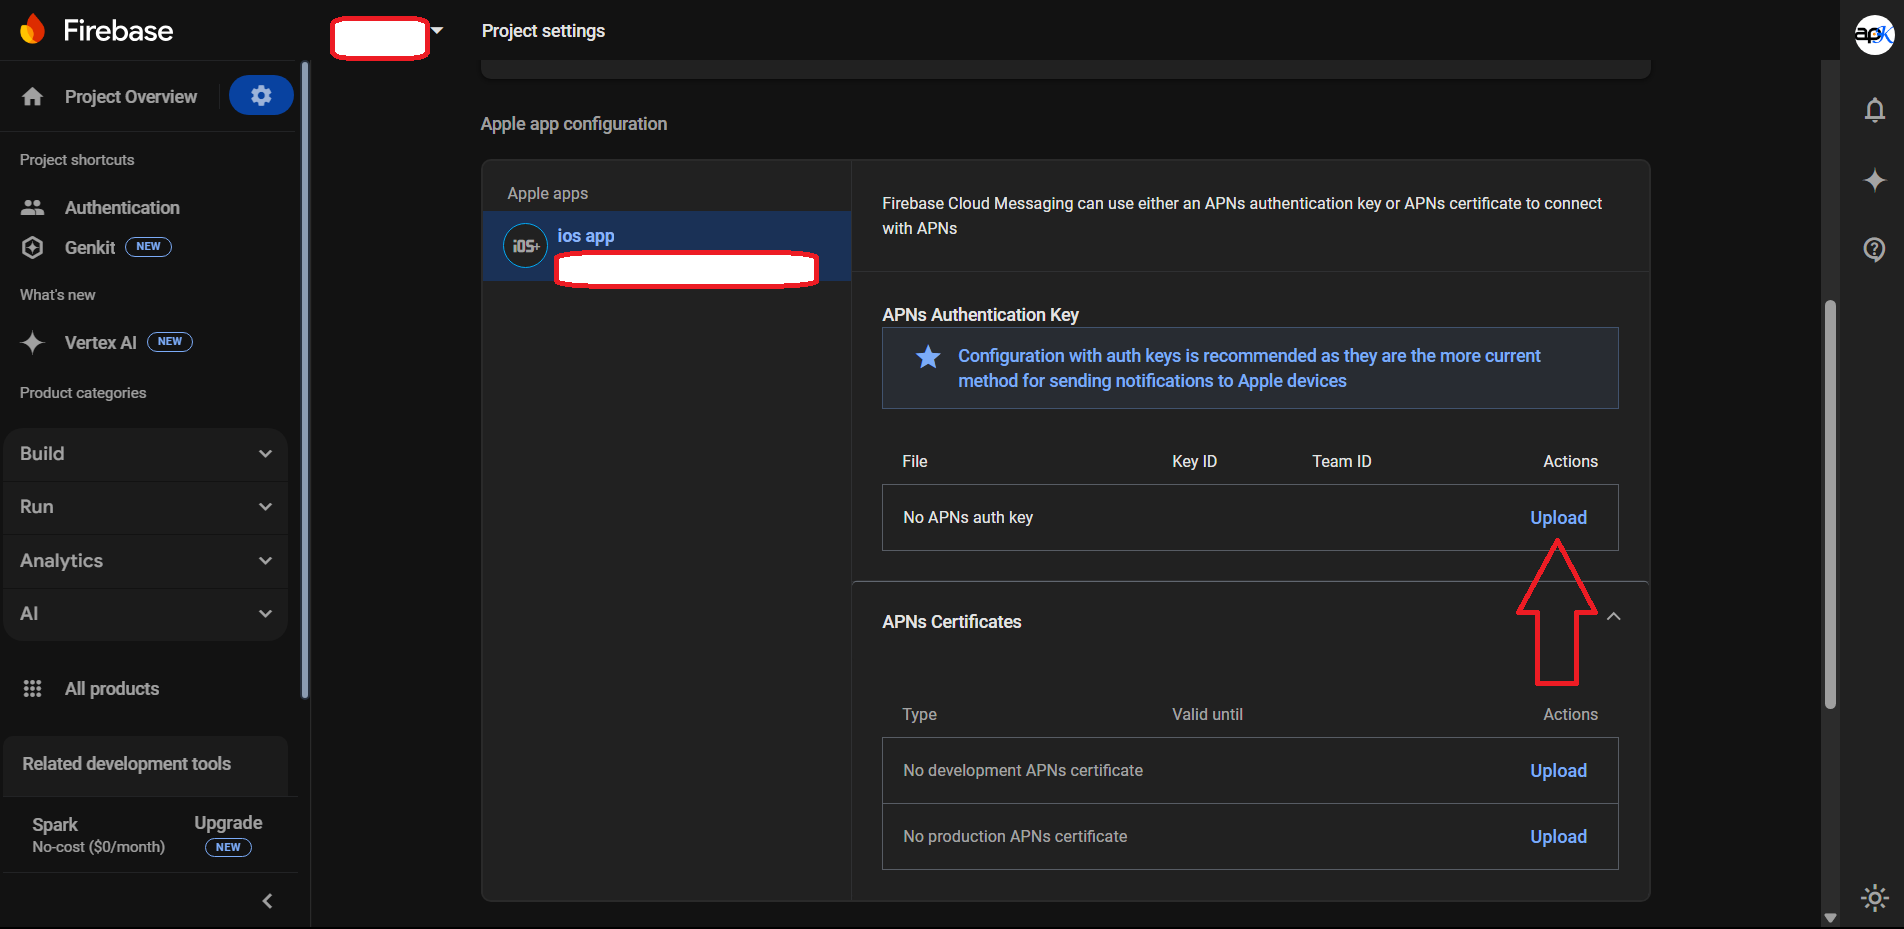
- Upload your p8 Certificate here. (Follow this link to generate p8 certificate)
- Copy Key ID and Team ID (Obtain Team Id from your apple developer account):
-
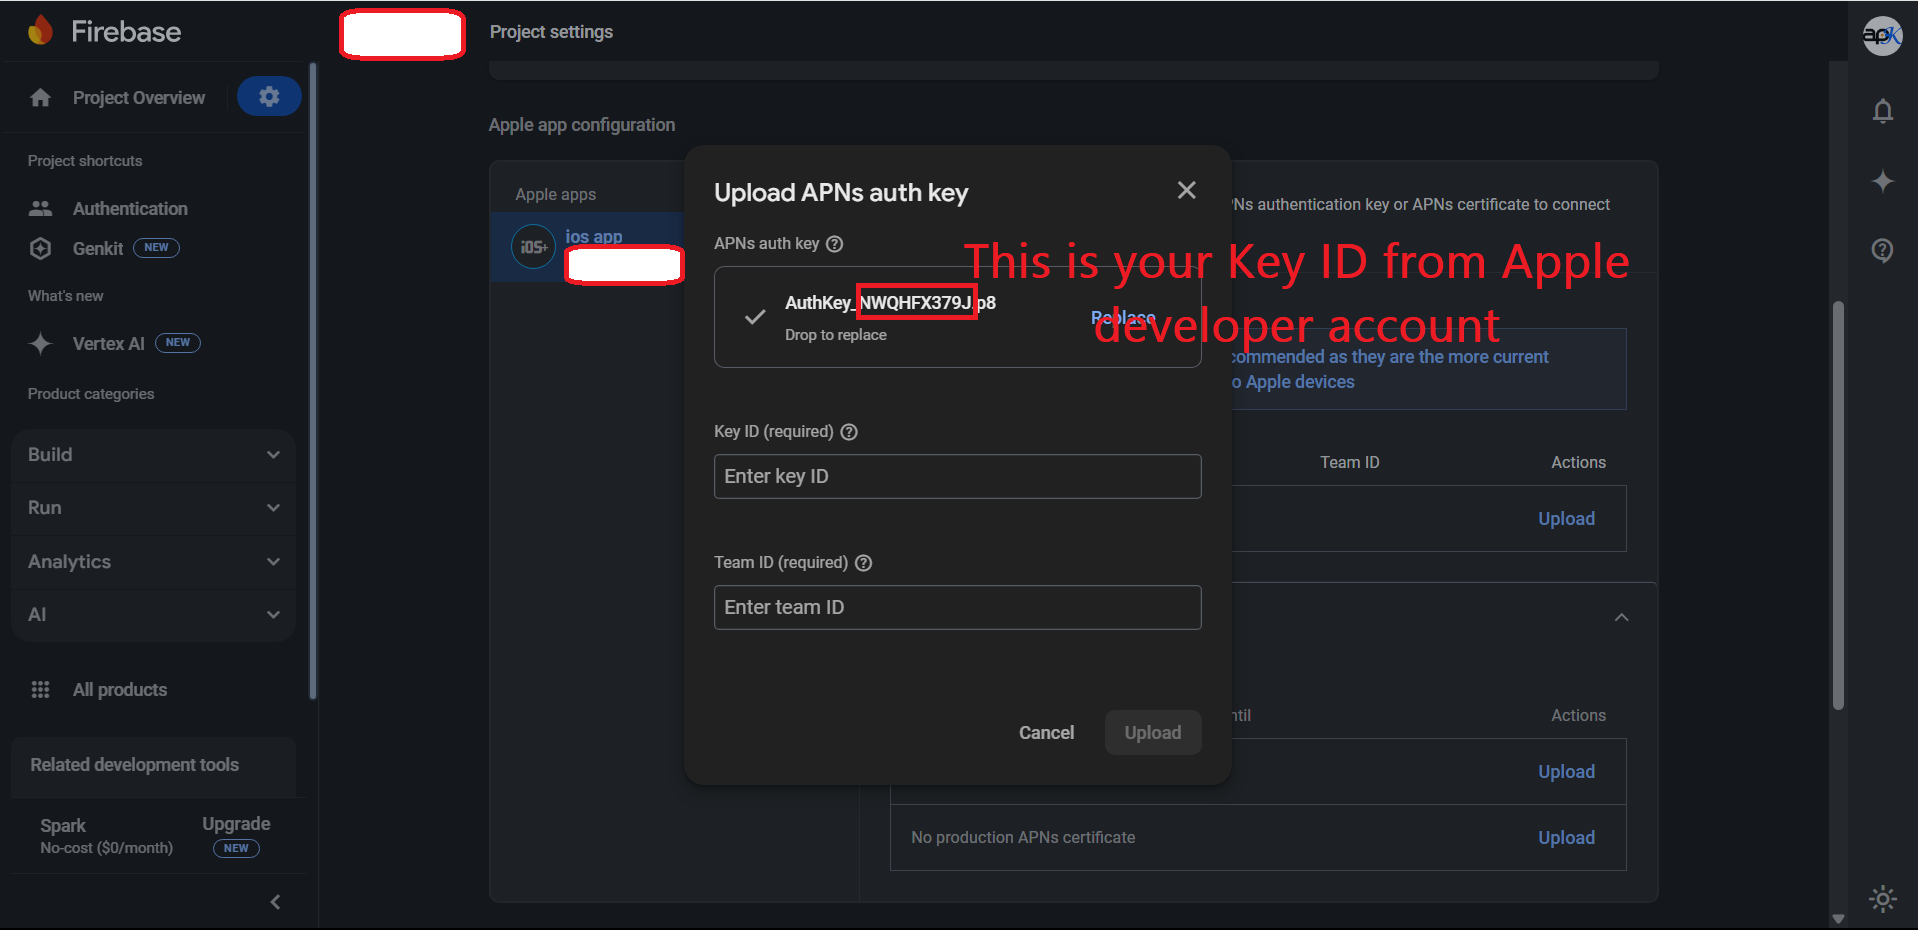
- Paste in Firebase console and upload it with p8 file
- Now Firebase is installed for Android and iOS both App
App Setup
Overview of the App Setup
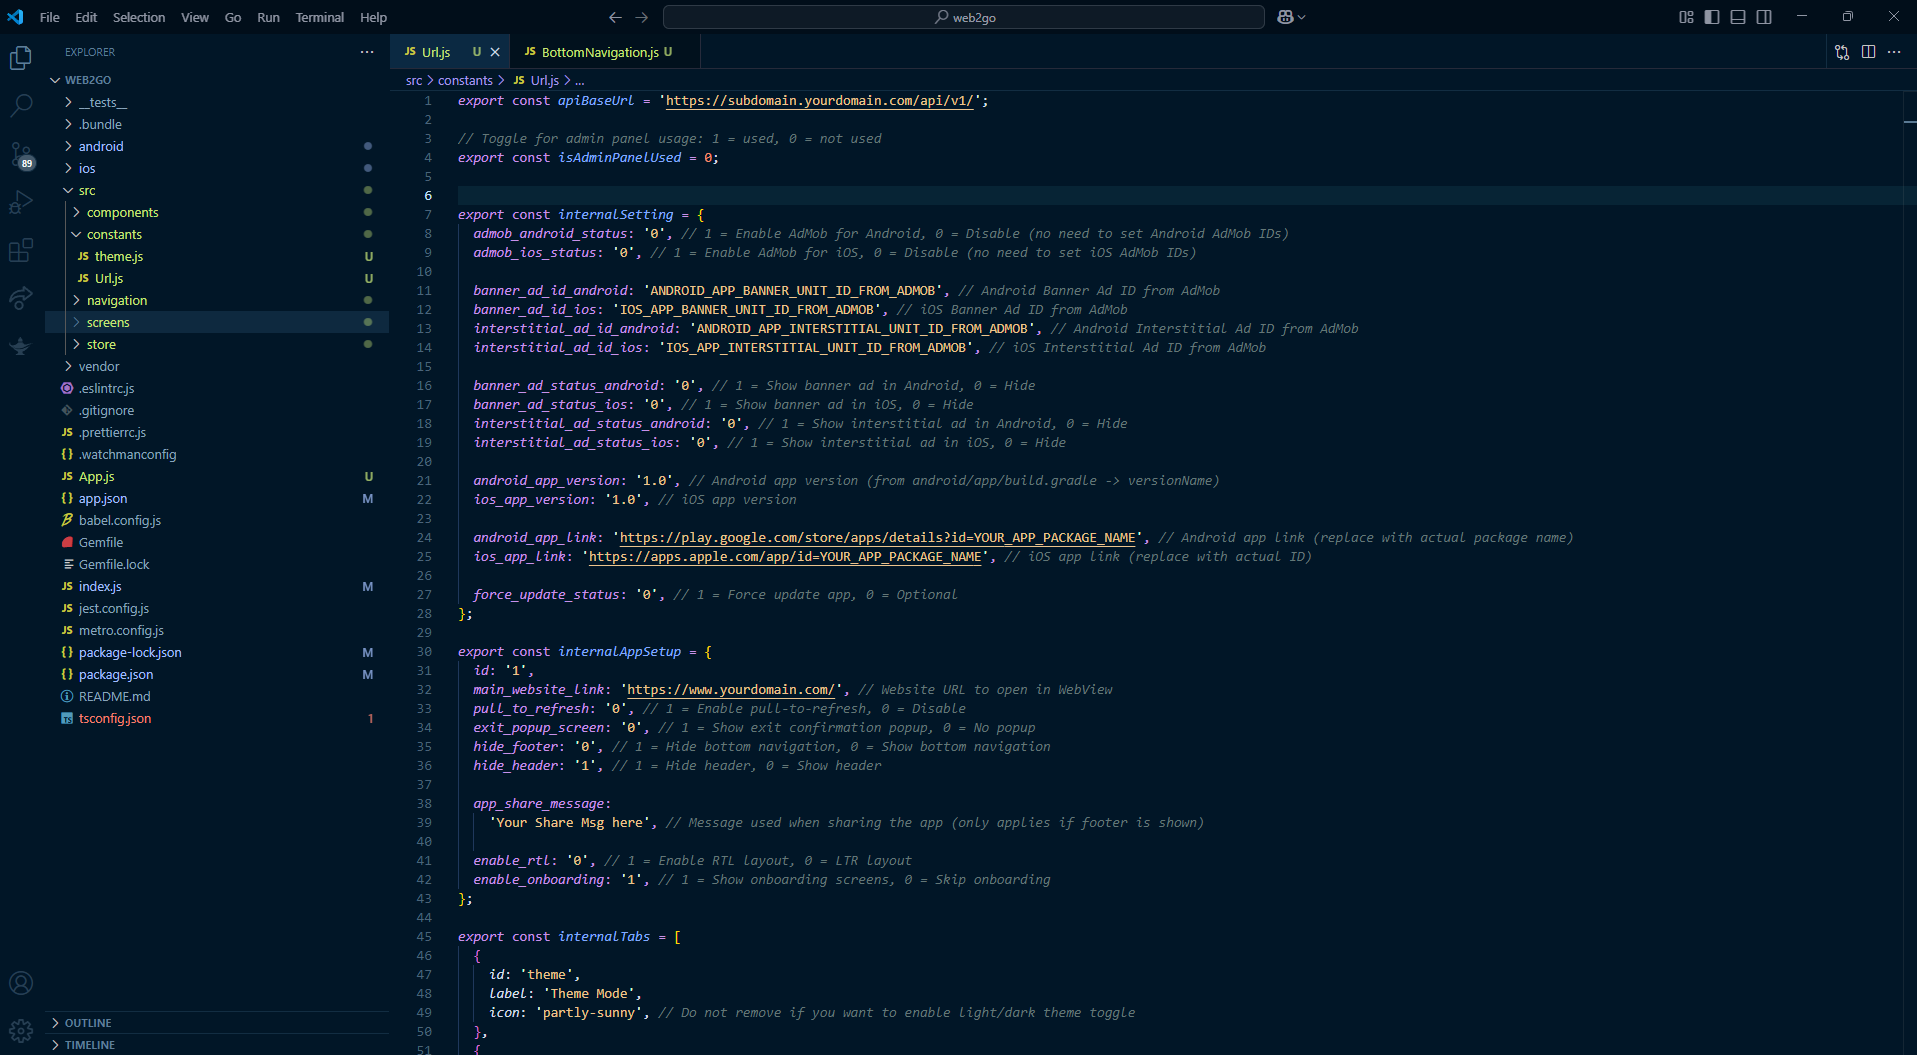
Web2Go without the admin panel: Navigate to the folder
Project/src/constants/ and open
URL.js as shown in the screenshot below. Here, the
first variable is isAdminPanelUsed, which must be
set to 0. For more reference, please read the
comments in the code.
export const isAdminPanelUsed = 0;
- Set the main website link for the WebView
- Customize the app sharing message
- Enable/disable app features like onboarding screens, pull-to-refresh, exit popup, and more
-
Main Website Link (WebView URL):
This is the main website that you want to load in the WebView. In URL.js, you will find the internalAppSetup variable. Under it, update the value of the main_website_link key (inside quotes). Always refer to the comments for guidance. -
App Share Message:
In the same URL.js, inside internalAppSetup, update the app_share_message key with your custom message (in quotes). This message appears when users share your app using the native share option. -
Enable/Disable Onboarding Screens:
Inside URL.js → internalAppSetup, set the value of enable_onboarding to '1' or '0' to show or hide onboarding screens on first app launch. If enable_onboarding is set to '1', you must configure the internalOnbording variable as well. Always refer to the comments. -
Enable/Disable Pull to Refresh (Android Only):
Inside internalAppSetup, update the pull_to_refresh key to '1' or '0'. This allows users to refresh the WebView by pulling down. Available only on Android. Refer to comments. -
Enable/Disable Exit Popup (Android Only):
Inside internalAppSetup, set the exit_popup_screen key to '1' or '0'. This enables a confirmation popup when the user presses the back button to exit the app — useful for preventing accidental exits. Android only. -
Enable/Disable Hide Footer:
Inside internalAppSetup, set the hide_footer key to '1' or '0'. This hides the bottom navigation bar (footer) in the app interface. Refer to comments. -
Enable/Disable Hide Header:
Inside internalAppSetup, set the hide_header key to '1' or '0'. This hides the top header bar, allowing a full-screen WebView experience. -
Enable/Disable RTL (App Only):
Inside internalAppSetup, set the enable_rtl key to '1' or '0'. This enables Right-to-Left layout support for languages like Arabic or Hebrew. It affects only the app's layout direction.
Admob Installation
Android
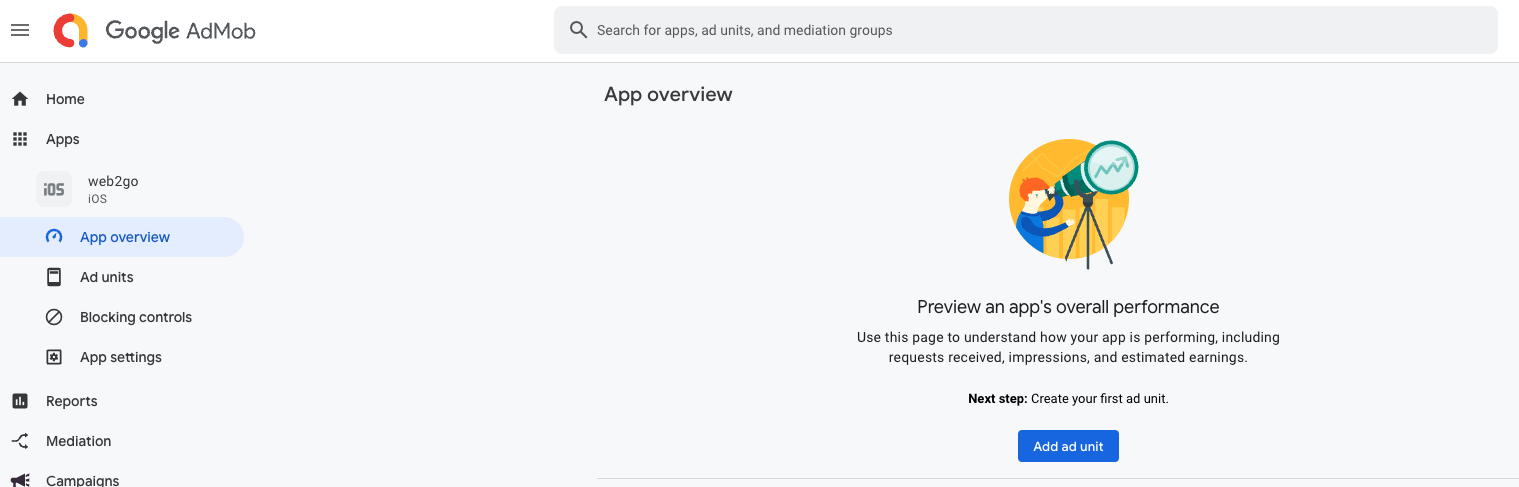
- 1. Log in to your AdMob account on the AdMob website.
- 2. Navigate to the "Apps" section or a similar menu in the AdMob console.
- 3. Look for an option to "Add Android App" or a similar function.
- 4. Click on the "ADD APP" button.
- 5. Follow any additional steps or prompts to complete the app addition process.
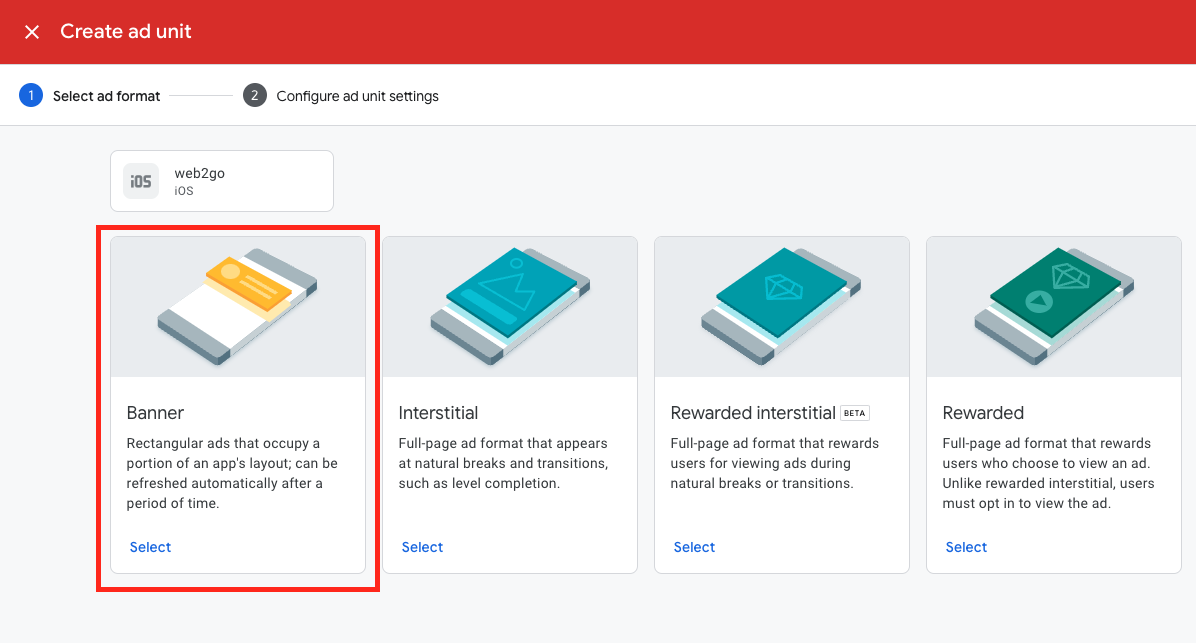
- 6. Click on Add ad Unit
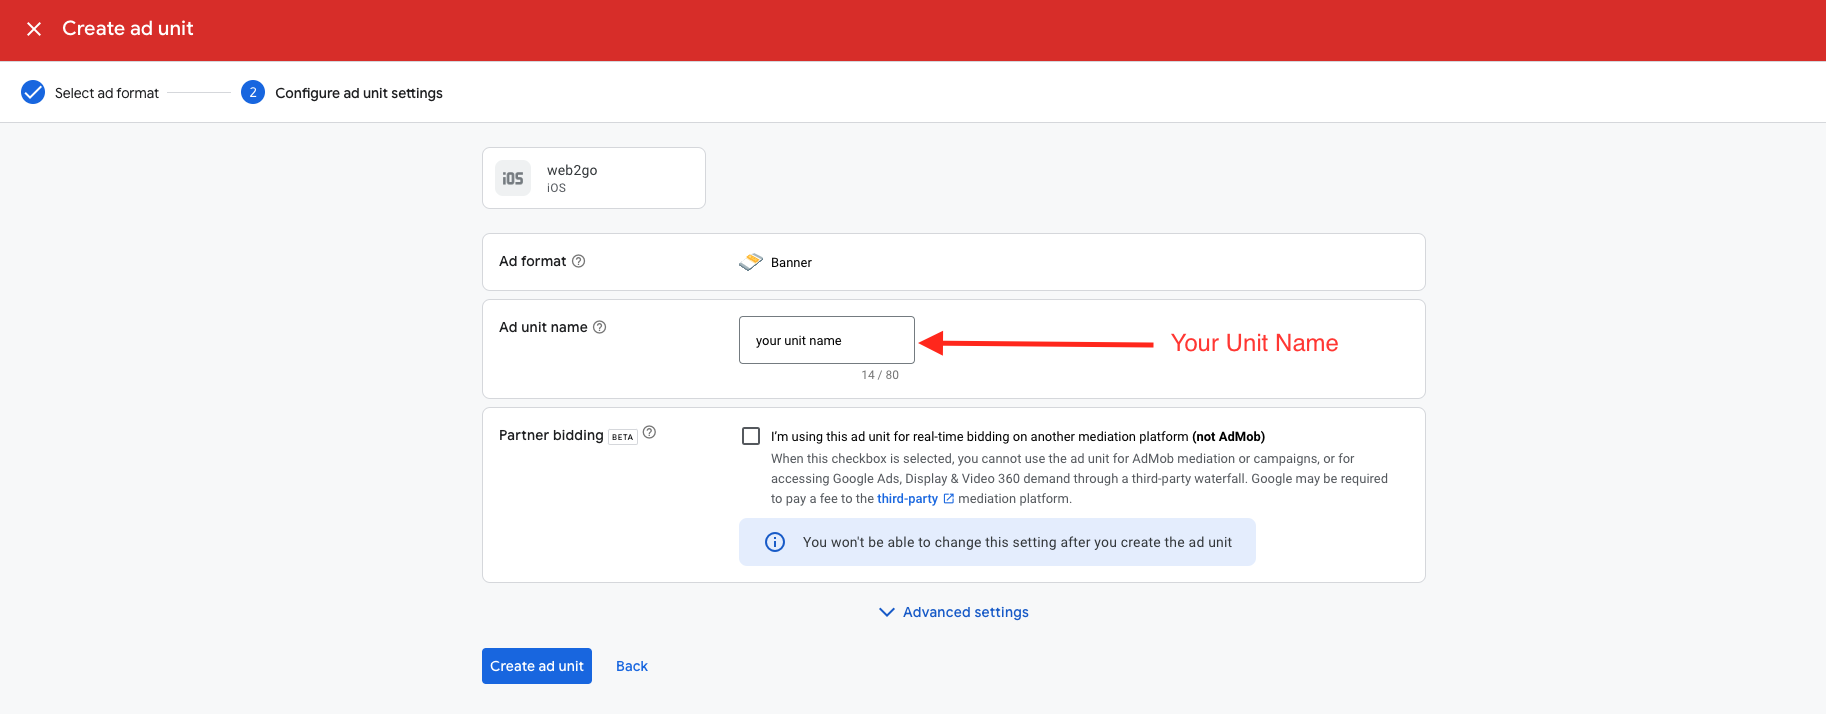
- 7. Select "Banner" ad unit, enter the banner unit ad name, then click on "Create Ad Unit" button.
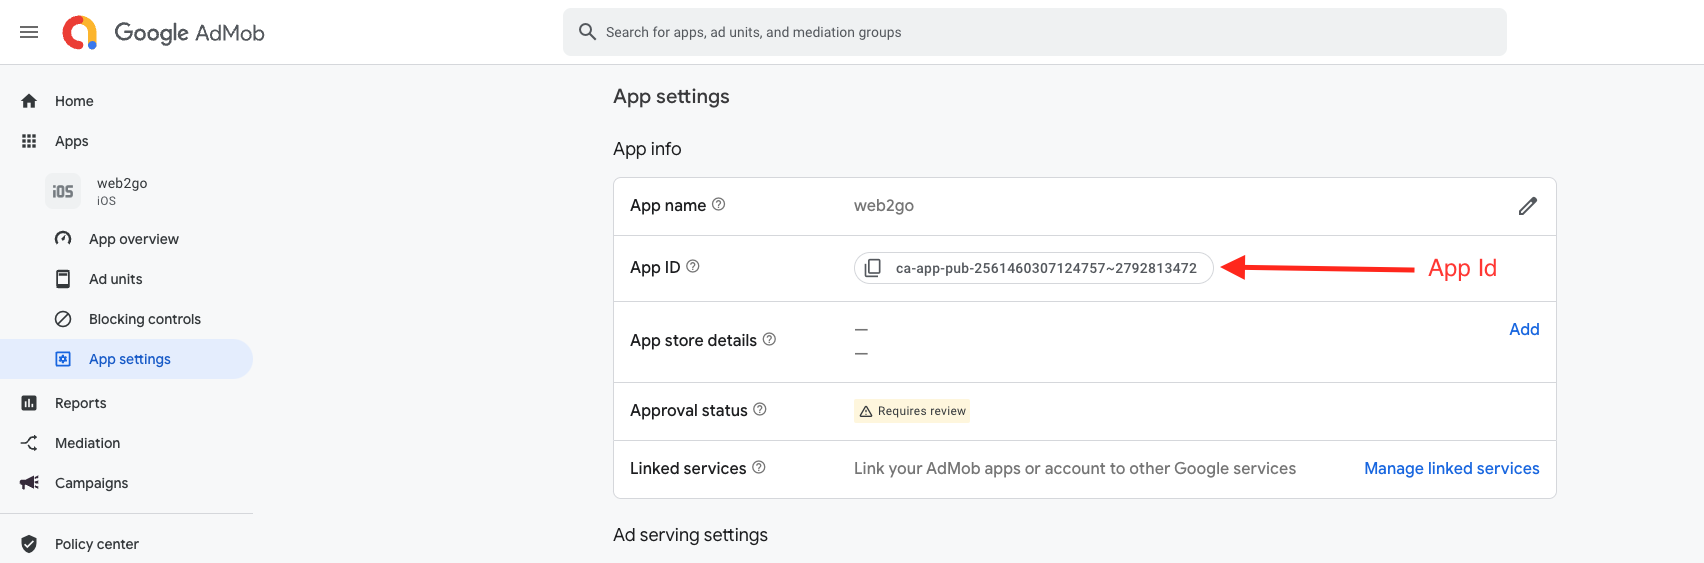
- 8. Get AdMob App ID : Click on App Setting
- 9. Get Ad units ID : Click on Ad Units
- Do above steps for interstitial ads from step 7


iOS
- 1. Log in to your AdMob account on the AdMob website.
- 2. Navigate to the "Apps" section or a similar menu in the AdMob console.
- 3. Look for an option to "Add IOS App" or a similar function.
- 4. Click on the "ADD APP" button.
- 5. Follow any additional steps or prompts to complete the app addition process.
- 6. Click on Add ad Unit
- 7. Select "Banner" ad unit, enter the banner unit ad name, then click on "Create Ad Unit" button.
- 8. Get AdMob App ID : Click on App Setting
- 9. Get Ad units ID : Click on Ad Units
- Do above steps for interstitial ads from step 7
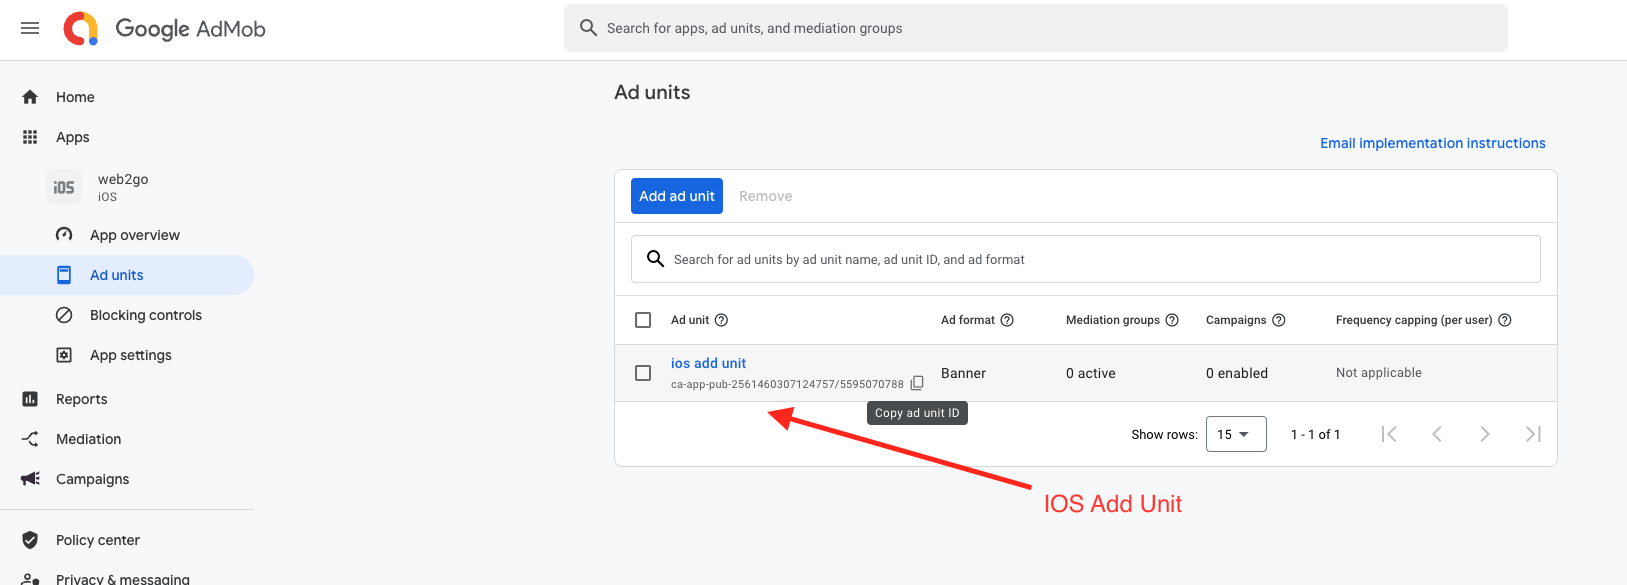
You have created Banner Unit ID and Interstitial Unit ID for both Android and iOS. These IDs will be used in the app. Where to update them in the app is clearly mentioned in the section below.
ADS Setup
Overview of the ADS Setup
Web2Go Ads Setup without the admin panel. Navigate to the folder
Project/src/constants/ and open
URL.js as shown in the screenshot below.
Here, the first variable is isAdminPanelUsed, which
must be set to 0. For more reference, please read
the comments in the code.
You can enable or disable ads, set Ad Unit IDs, and manage both
Android and iOS ad configurations.
In URL.js, you will find the
internalSetting variable. Under it:
• To enable ads in Android, set
admob_android_status (inside quotes) to
'1'. To disable, use '0'.
• To enable ads in iOS, set admob_ios_status
(inside quotes) to '1'. To disable, use
'0'.
Please refer to the comments in the code for further details.
- Banner Ad Unit ID
(Android):
Set your AdMob Banner Ad Unit ID for Android devices. This is required to show banner ads. In the same URL.js file, locate the internalSetting variable and update the value of banner_ad_id_android (inside quotes). - Banner Ad Unit ID
(iOS):
Set your AdMob Banner Ad Unit ID for iOS devices. This is required to show banner ads. In the same URL.js file, locate the internalSetting variable and update the value of banner_ad_id_ios (inside quotes). - Interstitial Ad Unit ID
(Android):
Set your Interstitial Ad Unit ID for Android—used to show full-screen ads during transitions. In the same URL.js file, locate the internalSetting variable and update the value of interstitial_ad_id_android (inside quotes). - Interstitial Ad Unit ID
(iOS):
Set your Interstitial Ad Unit ID for iOS—used to show full-screen ads during transitions. In the same URL.js file, locate the internalSetting variable and update the value of interstitial_ad_id_ios (inside quotes).
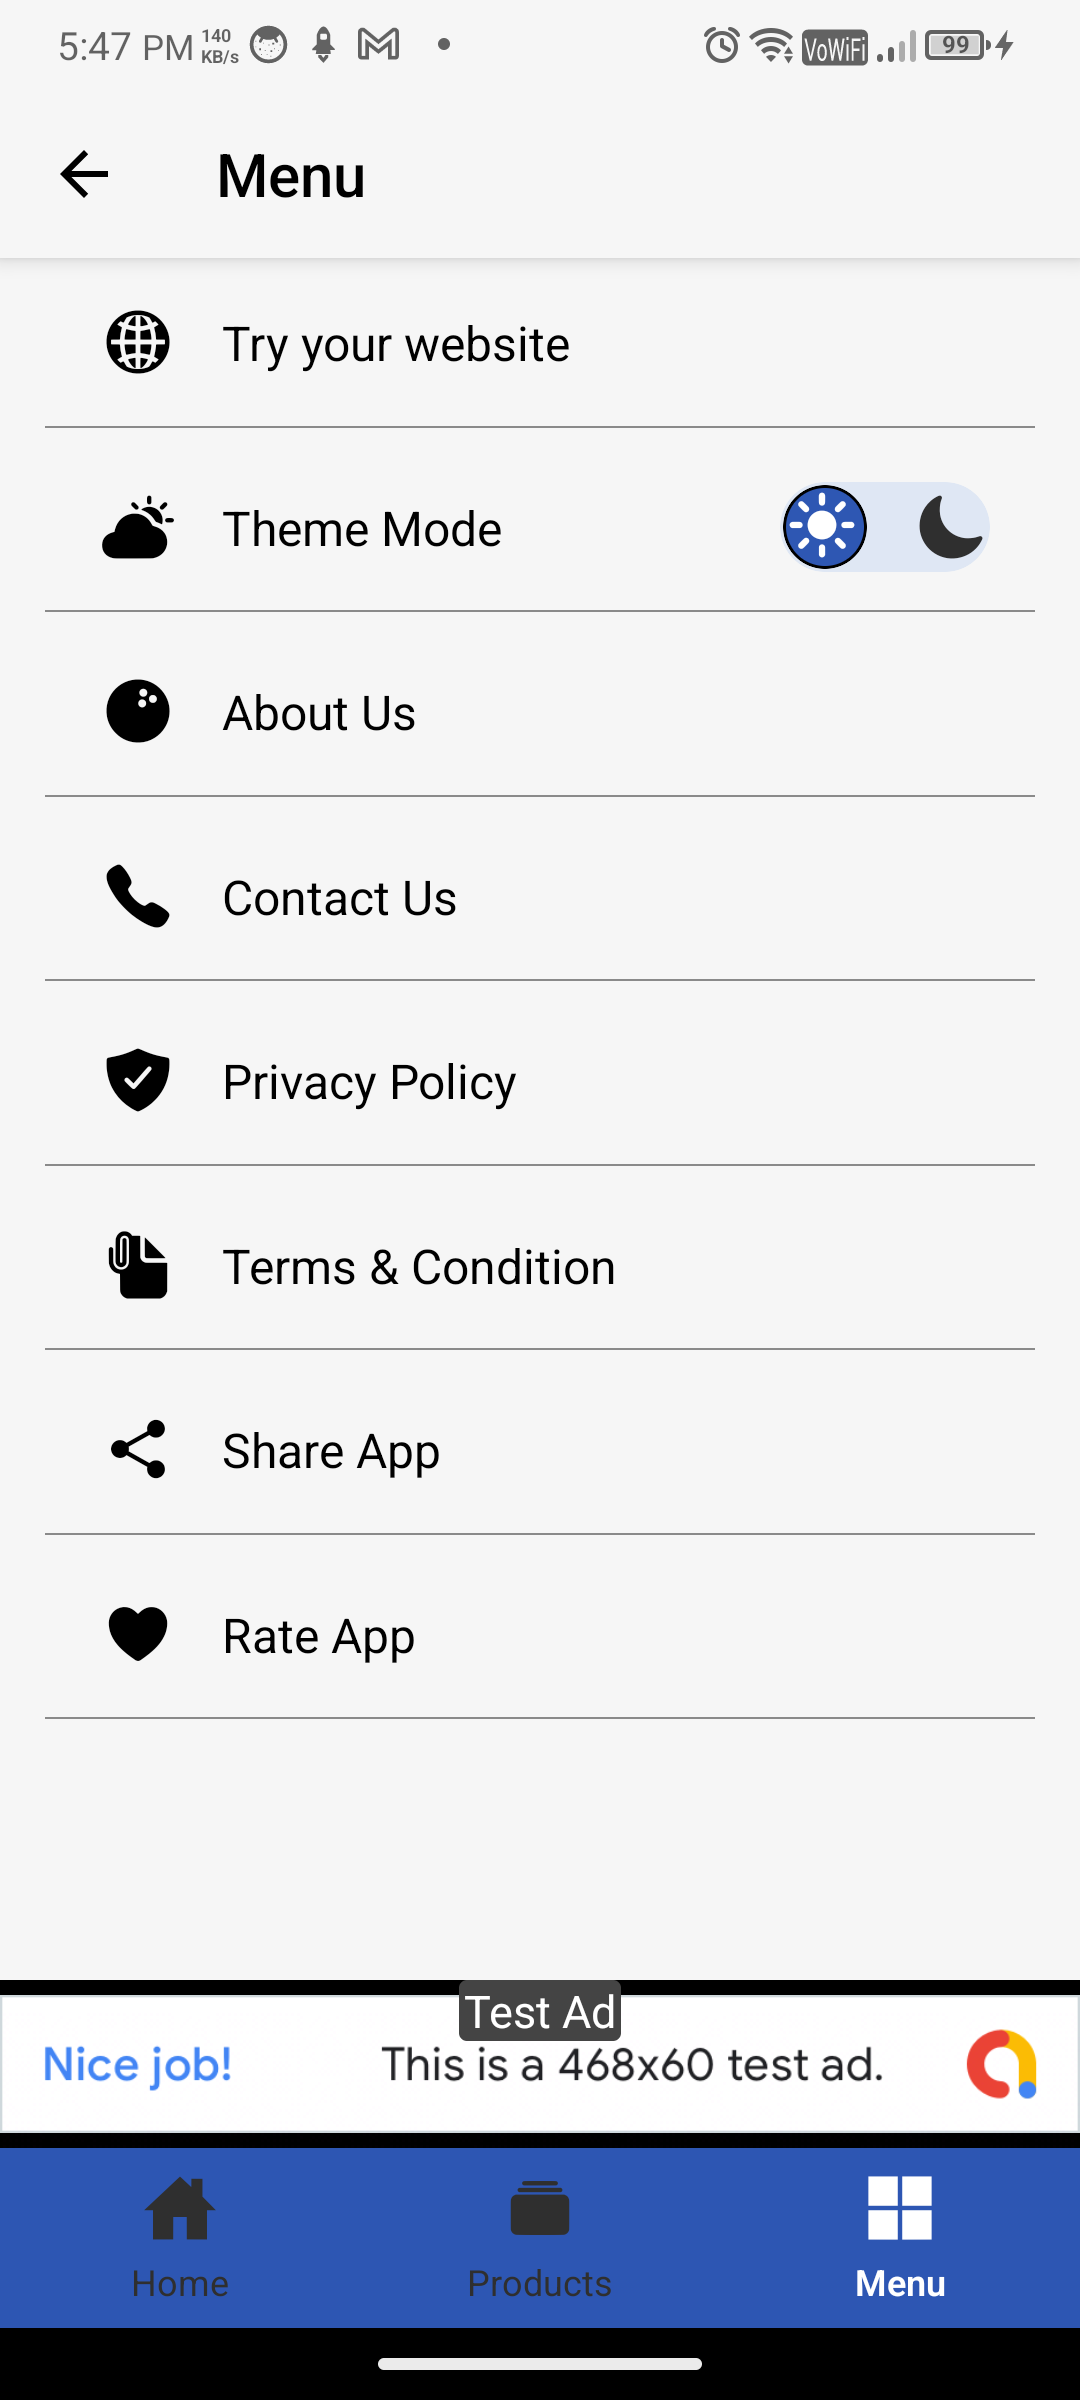
Menu Screen Setup
Overview of the Menu Screen Setup
Web2Go Ads Setup without the admin panel.
Navigate to the folder Project/src/constants/ and
open the file URL.js as shown in the screenshot
below.
The first variable you will see is
isAdminPanelUsed, which must be set to
0 to disable admin panel usage.
For more reference, please read the comments in the code.
You can also modify the Menu Screen from this file.
In the same URL.js file, locate the variable
internalTabs. Under this, you can update the links
you want to display in the menu and also change the tab page names
accordingly.
For a better understanding, make sure to read the comments provided
in the code.
To update any icon goto this link. the Icon only work that under
Ionicons only
Bottom Navigation Setup
Overview of the Bottom Navigation Setup
Web2Go Ads Setup without the admin panel.
Navigate to the folder Project/src/constants/ and
open the file URL.js as shown in the screenshot
below.
The first variable you will see is
isAdminPanelUsed, which must be set to
0 to disable admin panel usage.
For more reference, please read the comments in the code.
You can also modify the Bottom Navigation from this file.
In the same URL.js file, locate the variable
internalBottomTabs. Under this, you can update the
links you want to display in the menu and also change the tab page
names accordingly.
We recommended you, you can add up to total 4 to 5 Tabs for
better visibility
For a better understanding, make sure to read the comments provided
in the code.
To update any icon goto this link. the Icon only work that under
Ionicons only
Theme Setup
Overview of theTheme Setup
Web2Go Ads Setup without the admin panel.
Navigate to the folder Project/src/constants/ and
open the file theme.js as shown in the screenshot
below.
The first variable you will see is
isAdminPanelUsed, which must be set to
0 to disable admin panel usage.
For more reference, please read the comments in the code.
You can also modify the Theme from this file.
In the same theme.js file, locate the variable
statusBarColor. Update its Color that you want in
Status Bar.
In the same theme.js file, locate the variable
BaseColor. Under this you will find various
variable you cange colord accoding you
For a better understanding, make sure to read the comments provided
in the code.
Update Version
Android
- To Change App Logo Navigate from
web2go_android_ios_app_v2.5 -
Open web2go_android_ios_app_v2.5 => web2go => android => app -
Now open file
build.gradlefind defaultConfig as heading - Change versionCode & versionName

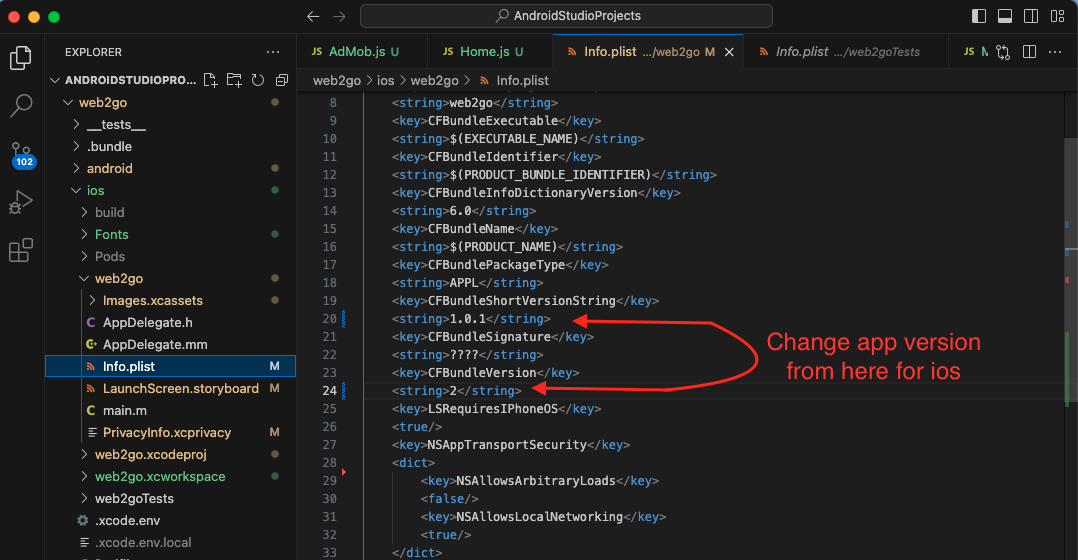
iOS
- To Change App Logo Navigate from
web2go_android_ios_app_v2.5 -
Open web2go_android_ios_app_v2.5 => web2go => ios => web2go => info.plist file - Now follow below image
Release App
Android
- Follow official documentation of react native for generating signed apk, link given below
- Publishing to Google Play Store
iOS
- Follow official documentation of react native for uploading app o App Store, link given below
- Publishing to Apple App Store
Support
How to get assistance
Thank you for purchasing our product! For any support or assistance, feel free to reach out to us via the provided email address. Our dedicated support team is available 24/7, ready to help with any questions, technical issues, or inquiries you may have. We are committed to providing prompt and reliable assistance to ensure a seamless experience with our product. Your satisfaction is our priority, and we are here to support you every step of the way.